On July 18, 1860, when the British astronomer Warren De la Rue set out to photograph the total solar eclipse at Rivabellosa, Spain, he brought with him hundreds of pounds of equipment, including 113 pounds of engineer’s and carpenter’s tools; 139 pounds of water; lamps, lamp-oils, and wine weighing in at around 73 pounds; a small stove; and a kettle.
De la Rue also set up a darkroom laboratory on-site, and according to the astronomer and anthropologist Anthony Aveni, he ultimately came home with forty glass negatives, taken over three minutes of totality. They were the first to picture the sun’s corona encircling the moon.
157 years later, an estimated 4.4 million people tuned into NASA’s live television coverage of the solar eclipse that took place over parts of North America. It was not only the most-viewed but also the most-photographed eclipse in history.
Today, it’s easier than ever to photograph the heavens, and De la Rue’s historic forty pictures of totality have been joined by countless others. Still, all modern photographers carry with them the same sense of awe and wonder that that astronomer felt more than a century ago, and luckily, they don’t need to carry hundreds of pounds of equipment or set up their own darkroom to capture unforgettable images.
Here are our top tips for photographing solar eclipses.
Know your eclipses
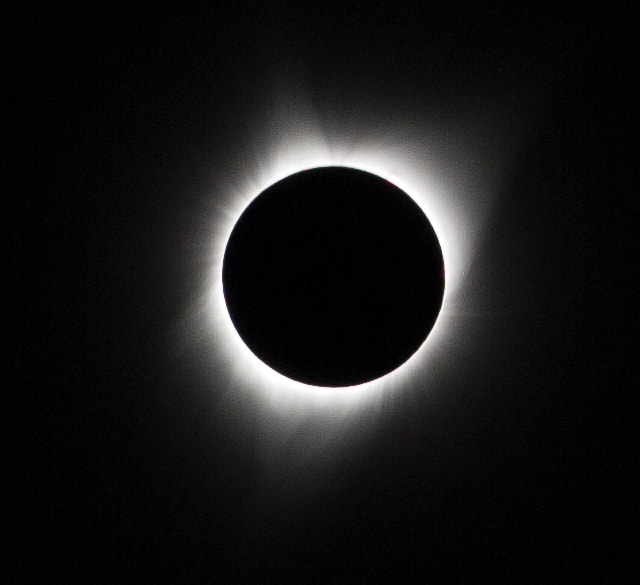
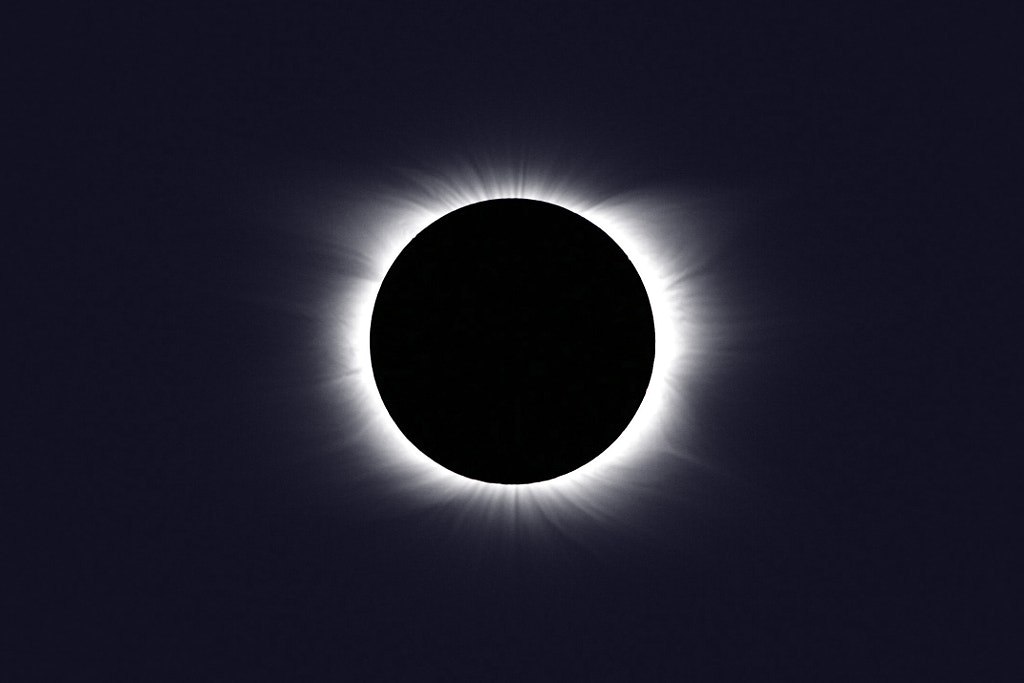
A solar eclipse happens when the moon moves between the Earth and the sun. A total solar eclipse, like the one in parts of North America in August of 2017 or the one in Chile and Argentina in July of 2019, only occurs when the moon appears to completely “block out” the sun, plunging viewers into darkness and revealing the sun’s pearly “corona.”
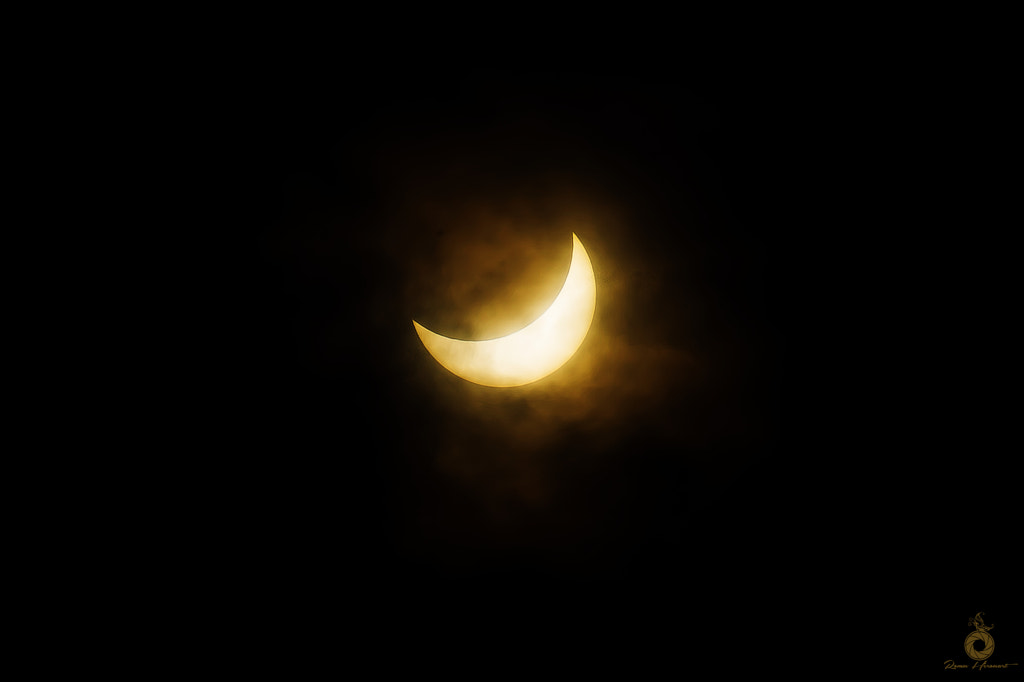
If you’re outside of the path of totality, you might still see a partial eclipse; the moon will pass in front of the sun, but it won’t cover it entirely. Total and partial eclipses happen when the moon’s orbit is close to Earth, making it appear larger than the sun.
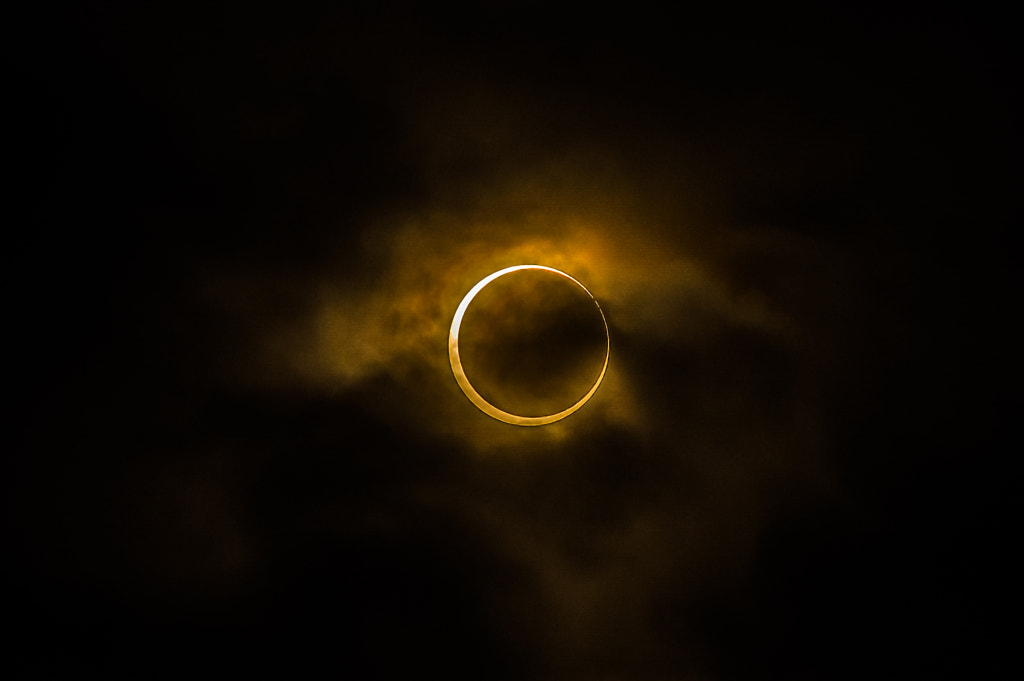
Annular eclipses, on the other hand, occur when the moon is closer to the farthest point on its orbit, making it appear smaller. In this case, a fiery ring of sunlight will appear in the sky when the eclipse reaches its maximum point. Finally, a rare hybrid eclipse features both an annular and total eclipse, with one shifting into the other based on the curvature of the Earth.
Understanding the various types of solar eclipses—and their stages—will form the foundation of any photoshoot you have planned. Keep an eye out for those “iconic” shots that are unique to the specific eclipse you’re viewing, whether it’s the faint white corona or the ring of fire.
Get a good solar filter
You’ll need good, high-quality solar glasses to view any solar eclipse; otherwise, you risk permanently damaging your eyes. Just as you need eclipse glasses to prevent harm to yourself, your camera needs protection from the sun as well. Thousand Oaks Optical makes some great glass solar filters, as does Baader Planetarium.
Keep both your glasses and solar filter on for all the partial phases for your safety and the safety of your camera. Even if you’re wearing your glasses, it’s unsafe to look at the sun through the viewfinder of an unfiltered camera.
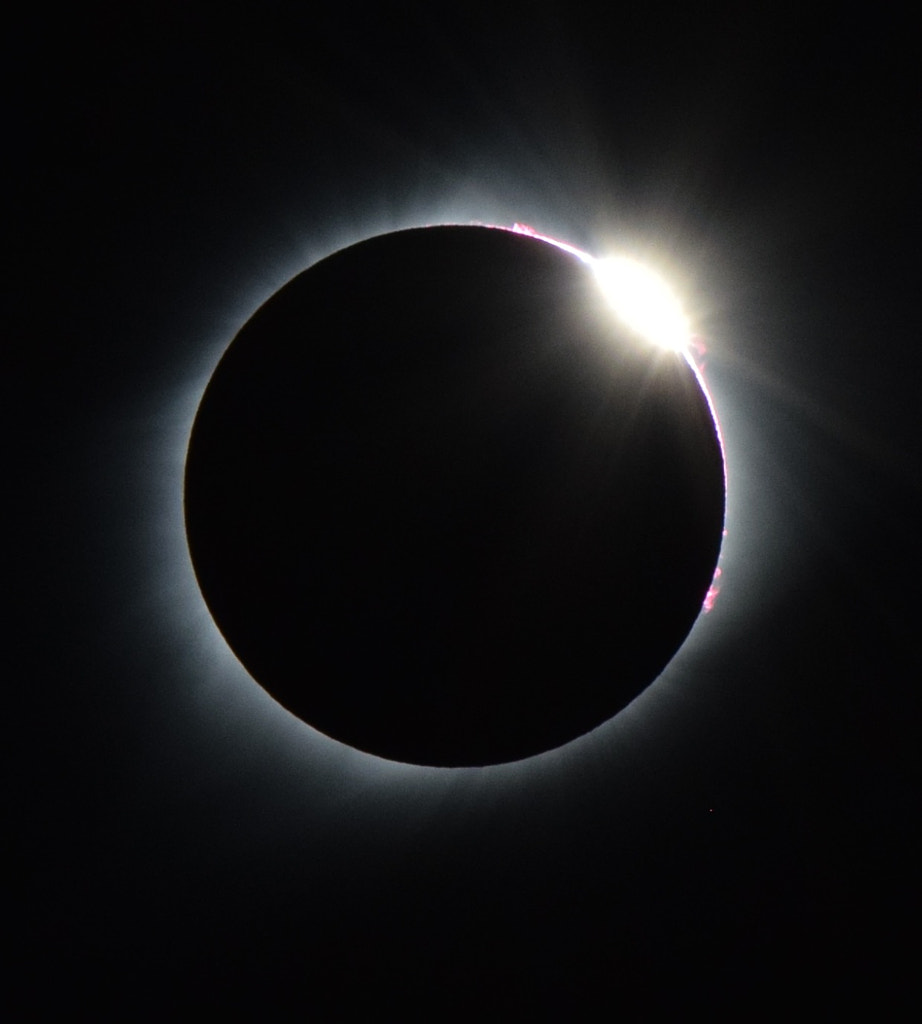
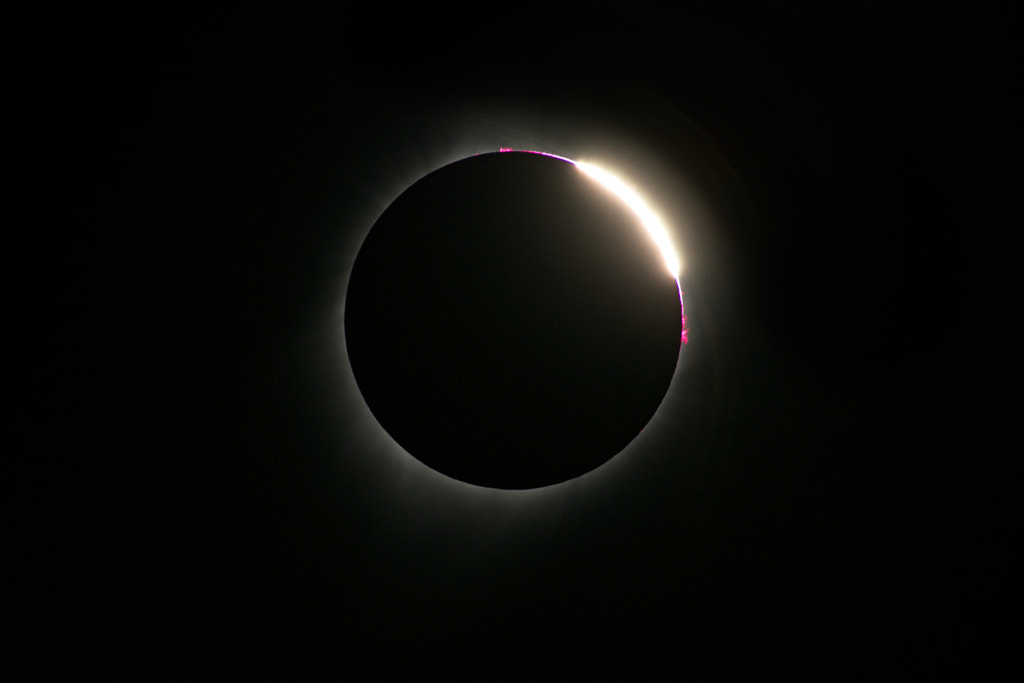
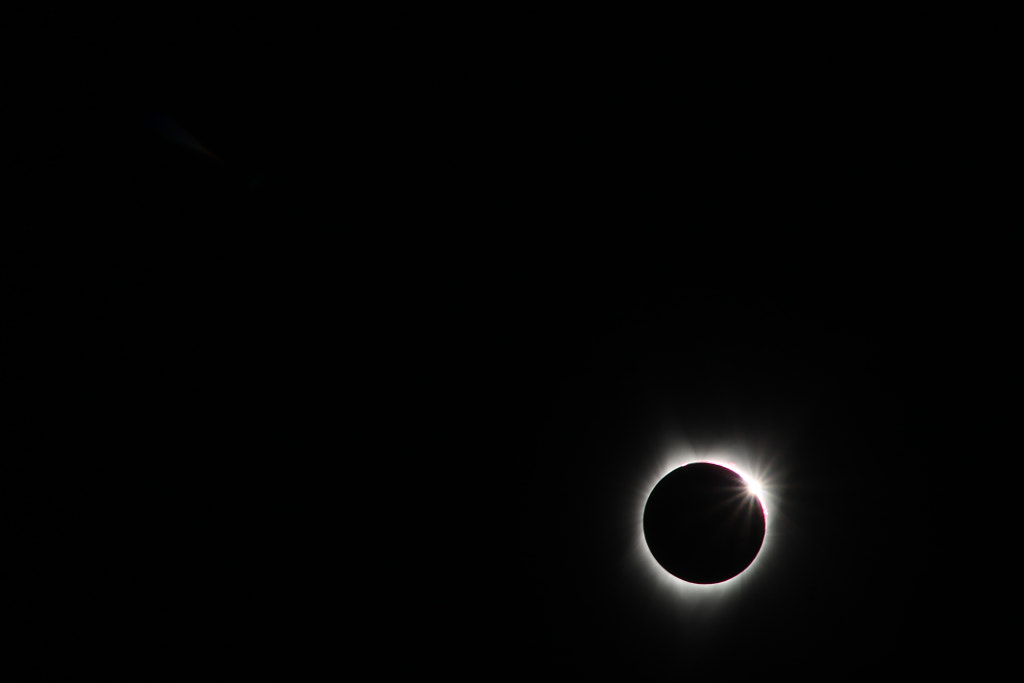
If you’re shooting a total solar eclipse, you must remove the filter when it reaches totality and then replace it once the total phase is over. The exact moment when the sun is 100% blocked is also the only time you’ll be able to glimpse the eclipse with the naked eye, but it lasts for just a few instants, so be careful and remember to avert your eyes as soon as it’s over (you can set a timer for this).
Find “your” camera
You can photograph a solar eclipse with almost any camera, depending on the look you want. If you’re shooting landscapes or people with the sun in the background, even your mobile phone can work, though we recommend installing a plug-in or app that lets you shoot RAW files.
Don’t forget your glasses, and use an additional pair to protect your phone camera. The sun will look small in these images, so if you want it to look bigger, you’ll need to attach your phone to a telescope; zooming will just result in grainy photos.
A simple point-and-shoot can also get some nice images of the partial phases when used in conjunction with a telescope with a solar filter and wide-field eyepiece (here, you’d use your LCD screen to compose your shot). And of course, a DSLR is always ideal if you have the budget for it, especially since you can try out different lenses to get the perspective you want.
A wide-angle lens (like the one on your phone) will work for environmental shots with a faraway sun, but if you want to get close to the sun, your best bet is using a super-telephoto lens (400mm minimum)—or attaching your camera to a telescope. That’s where you’ll get those detailed images of Baily’s beads, or the diamond ring effect, which happens when sunlight hits the rugged surface of the moon. If you use a super-telephoto, invest in a tracker so you can follow the path of the sun.
Still, you don’t have to shell out a ton of money for a fancy camera; it’s far more important to have a solid and familiar camera that you know well. Look around until you find a camera with a size and shape you like; remember that you’ll have to be quick in adjusting your settings and removing and replacing your solar filter.
Scout your location
Location is everything when it comes to solar eclipse photography, so choose your spot wisely. If you plan to capture a total eclipse, use an app like PhotoPills to pinpoint the “centerline,” or the exact spot on the map where totality will last the longest. Some photographers spend months looking for the perfect location through satellite images.
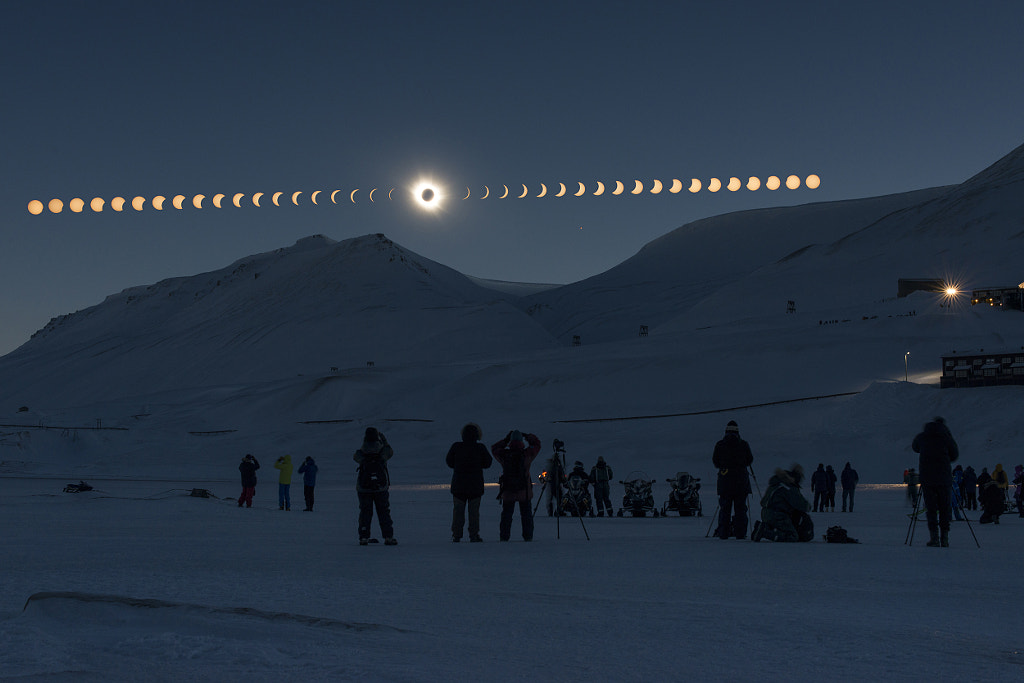
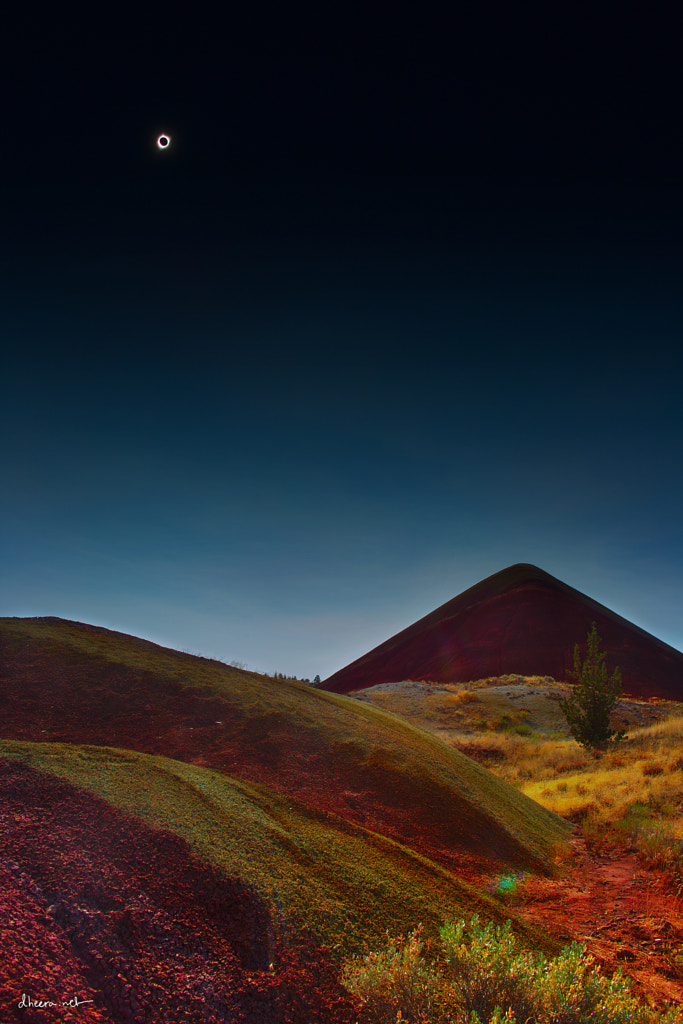
Many solar eclipse photos just feature the sun itself, but including the landscape can have a dramatic effect, especially if it’s a remote area. If you plan on taking a shot that incorporates the landscape, that’s always something to take into account; find a spot where the foreground will complement the eclipse, not obscure it.
Spend some time at your location, and make sure you know how it’ll look on the day of the shoot. You’ll need as much open space as possible to move around and ensure there are no distractions in your frame. If you know it will be crowded, plan to arrive early so you can get everything set up in the best spot possible.
Practice, practice, practice
When it comes to solar eclipse photography, you only have one chance to get it right, so it’s best to get any mistakes and mishaps out of the way before the day of the shoot. PhotoPills has detailed information and a calendar of upcoming eclipses so you can track exactly when the eclipse will take place in your location, right down to the second.
Once you have that information, time yourself as you do several test-runs. Ideally, these “rehearsals” should take place on a day when the weather forecast is similar to the actual conditions you’ll experience on the day of the eclipse, and of course, they should take place at the same time, so the sun is at the same elevation. You can use Clear Sky Chart a day or two before the shoot for detailed information.
Remember to bring a solid tripod and shutter release with you on your test days to prevent blurring, and give yourself time to practice removing and replacing your solar filter. Try out several different exposures, and play around with focusing manually (it’ll be too dark to use autofocus during totality).
When you get home, take a look at each photo and see what works and what doesn’t. If possible, spend several weeks photographing both the sun and the moon so that it’s second-nature once the time comes.
Bracket your exposures
Often, you’ll need to bracket several exposures to get a crisp, clear shot of an eclipse—especially during totality, since the light will change rapidly. Be sure to get enough shots at different exposures so that you can refine them later in post, and check your histogram regularly.
Enjoy the show
Warren De la Rue, the British astronomer who captured the first photos of the corona, went home with one regret. He wrote, “I well remember that I wished I had not encumbered myself with apparatus, and I mentally registered a vow, that, if a future opportunity ever presented itself for my viewing of a total eclipse, I would give up all idea of making astronomical observations, and devote myself to the full enjoyment of the spectacle which can only be obtained by the mere gazer.”
This sentiment is one that’s recurred throughout the decades; photography is important, but remember to take some time to enjoy the eclipse experience for yourself, without worrying about the camera. You might not get another chance to observe the phenomenon.
Play with composition
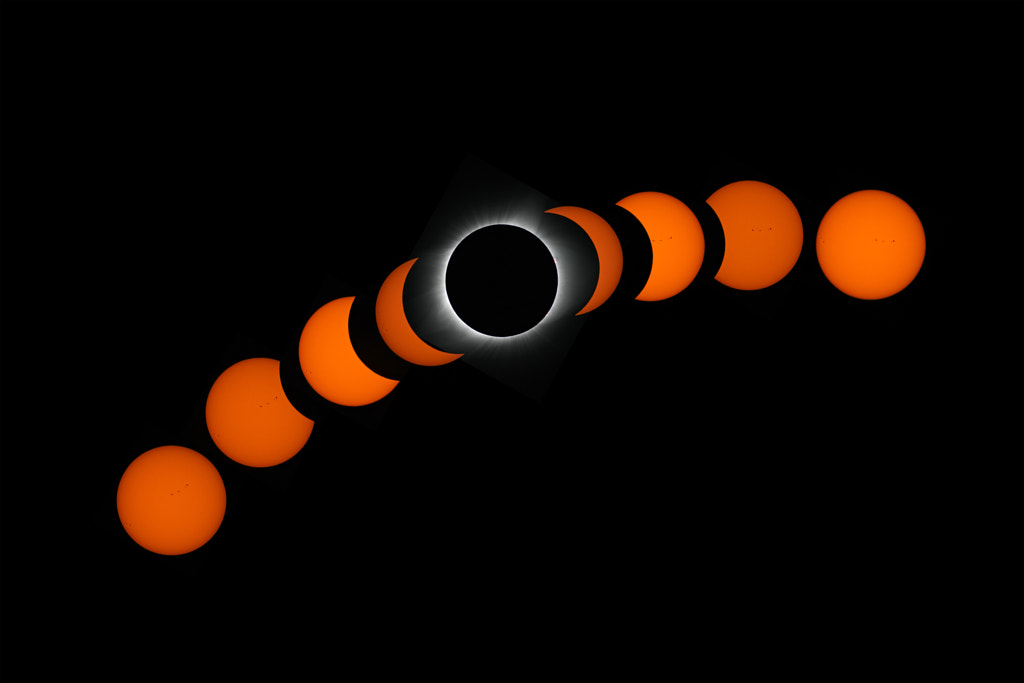
Some single shots of solar eclipses employ the rule of thirds, a solid composition technique for powerful images—but the options are limitless here.
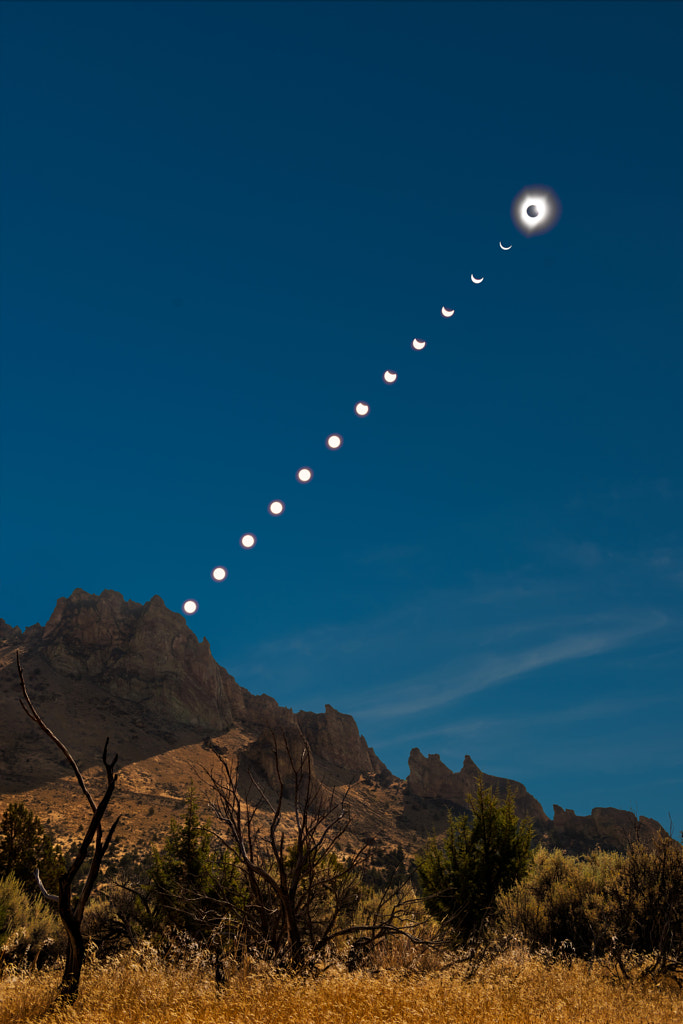
For example, many of the viral eclipse photos we see these days aren’t just a single frame; instead, they capture the different phases through a series of composited images. For these montages, you’ll need a good tripod, as your camera will need to remain fixed in the same spot so that all the phases are aligned.
As long as you clarify that it’s a composite, you can get as creative as you want with composition here; one of the most popular eclipse photos in recent history, created by National Geographic photographer Ken Geiger, is an illustration of the eclipse phases over Grand Teton National Park in Wyoming. By including interesting foreground elements, you can provide a sense of scale and highlight the vastness of the sky.
You might also like these articles:
Everything A Beginner Needs To Know About Astrophotography
Northern Lights Photography | The Essential Guide of Beginners
How To Create A Stunning Holden Hour and Night Cityscapes
5 Videos to Watch Before Photographing The Eclipse
Not on 500px yet? Sign up here to explore more impactful photography.
The post Solar eclipse photography | The essential guide for photographers appeared first on 500px.
[NDN/ccn/comedia Links]