Thursday, July 10, 2025

Long Shutter Techniques for Impactful Imagery

Photographers continually explore new methods to add creativity and depth to their images. One particularly captivating approach is using long shutter techniques—also known as long exposure photography—to capture expressive motion in a single, dynamic shot. If you’ve admired images of silky waterfalls, glowing city streets, or sweeping star trails, you’re witnessing the artistic use of long shutter speeds.

Let’s dive into how you can harness these techniques to create compelling photographs.
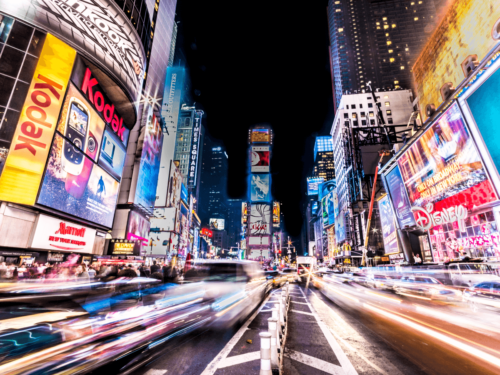
A vibrant view of Times Square at night with light trails from passing traffic, captured using long shutter techniques to create dynamic motion effects.

Understanding Long Shutter Techniques

Long shutter techniques involve intentionally extending your camera’s shutter speed, allowing the sensor to record movement as motion blur. Rather than freezing action, these techniques create fluidity and dynamism, transforming ordinary scenes into visually striking art.

Common subjects captured using long shutter speeds include flowing water, moving vehicles, drifting clouds, and star trails.

Essential Gear for Successful Long Shutter Photography

You don’t need extensive equipment to start, but these items significantly improve your results:

  • Tripod: Essential for stability during long exposures, preventing unintended blur.
  • Neutral Density (ND) Filters: Helps manage exposure by reducing light entering the lens, enabling longer exposures in brighter conditions.
  • Remote Shutter Release: Minimizes camera shake when triggering the shutter, resulting in sharper images.

How to Set Your Camera for Motion Blur

To achieve expressive motion, carefully adjust your camera settings:

  • Shutter Speed: Typically between a few seconds to several minutes, depending on your scene. Experimentation is key.
  • Aperture: Opt for narrower apertures (f/8 to f/16) to enhance depth of field and image sharpness.
  • ISO: Keep ISO low (100-200) to reduce noise and maintain image quality.

For example, capturing silky water usually involves shutter speeds around 1 to 5 seconds. For star trails, exposures can range from several minutes to hours.
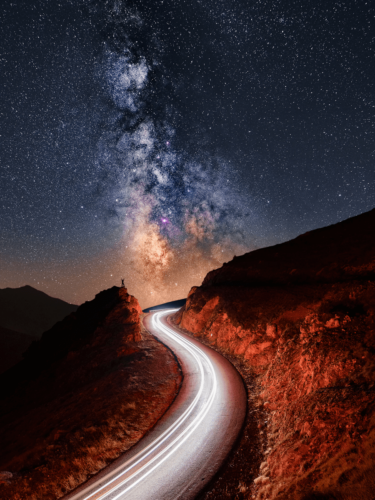
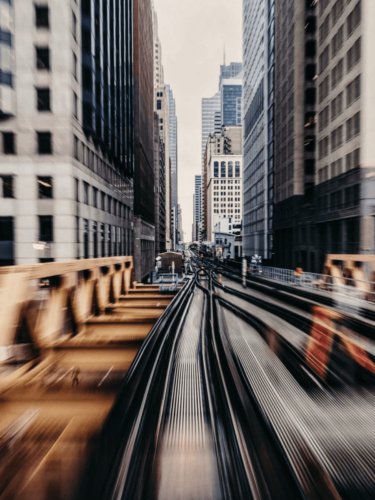
A winding mountain road leading to the Milky Way, with car light trails captured through long exposure photography to enhance the night sky scene. Blurred train tracks running through a cityscape, illustrating speed and depth using long exposure photography and motion blur techniques.

Tips to Create Impactful Long Exposure Images

Choose Moving Elements Thoughtfully

Identify scenes that inherently include motion, such as waterfalls, busy streets, or celestial bodies. The inherent movement is essential to producing dramatic effects.

Experiment with Exposure Duration

Shorter long exposures (around 1-2 seconds) maintain recognizable forms, while extended exposures (10 seconds or more) yield abstract and ethereal effects.

Focus on Composition

Compose intentionally, using motion blur as a compositional tool. Consider how leading lines, symmetry, or the placement of static versus moving elements impact your viewer’s experience.

Manual Focus in Low Light

Auto-focus can struggle in dim conditions. Switch to manual focus to precisely control your focal point and avoid accidental softness.

Common Mistakes and How to Avoid Them

Long shutter photography has unique challenges. Here are frequent pitfalls and how to prevent them:

  • Unintended Camera Movement: Always secure your camera with a sturdy tripod and consider using a remote shutter release.
  • Overexposure During Daytime: Use Neutral Density (ND) filters to limit incoming light for proper exposure control.
  • Lack of Clear Subject: Clearly define your main subject to prevent overly abstract or confusing compositions.

Inspirational Subjects for Long Shutter Photography

If you’re looking for inspiration, here are excellent subjects to experiment with:

  • Waterfalls and Seascapes: Capture silky water textures and soft waves.
  • Nighttime Cityscapes: Use car headlights and streetlights to create vibrant streaks of color and energy.
  • Astrophotography: Create awe-inspiring star trails to illustrate the earth’s rotation.
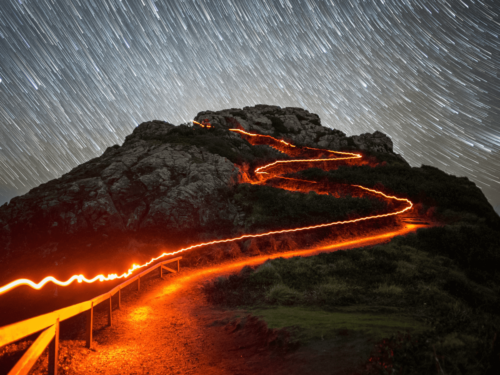
A glowing path up a mountain under star trails, captured with long exposure to convey expressive motion through swirling sky and light trails.

Conclusion: Embrace Creativity with Long Shutter Techniques

Mastering long shutter photography opens endless creative possibilities. By embracing experimentation and thoughtfully choosing your settings and subjects, you can transform everyday moments into captivating imagery.

Start exploring these expressive motion techniques today—your creative journey awaits.

Extended reading: Shutter speed | The essential guide for photographers

The post Long Shutter Techniques for Impactful Imagery appeared first on 500px.

[NDN/ccn/comedia Links]
Friday, July 4, 2025

Panning Photography: Capture Speed and Motion Like a Pro

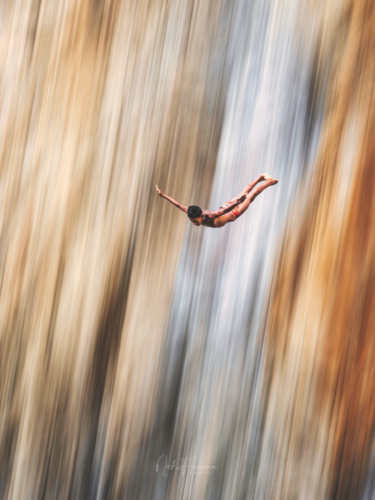
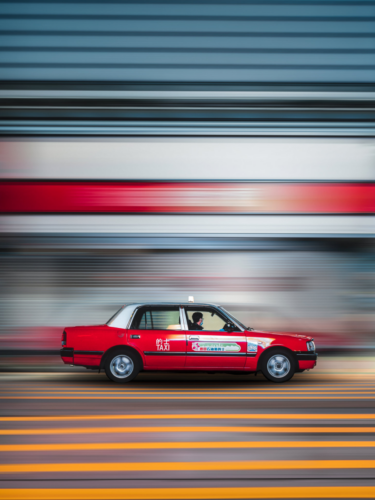
Perfecting panning photography is a powerful way to convey speed and motion in your photos. This technique lets you keep a moving subject sharp while artistically blurring the background, adding energy and excitement to your shots.

In this guide, you’ll discover everything you need to know about the panning technique, including shutter speed tips, focus modes, and smooth camera movement to create stunning motion blur photos.

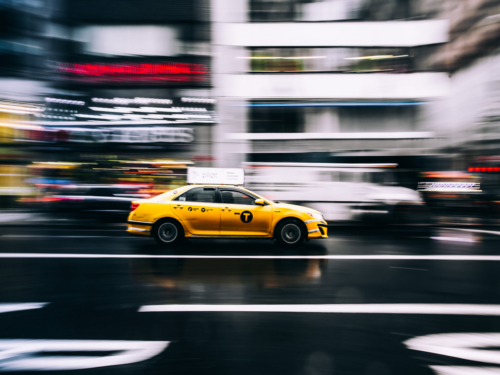
A yellow NYC taxi speeding through a city street, captured using panning photography to blur the background and highlight motion.

What Is Panning in Photography and Why Does It Work?

Panning photography involves moving your camera to follow a fast-moving subject during exposure. By matching your camera’s motion to the subject, you keep it sharp while the background blurs. This motion blur effect helps you capture dynamic scenes like races, wildlife, or street action with impact.

How to Perfect the Panning Technique in Photography

Step 1: Choose the Best Shutter Speed for Panning Shots

Shutter speed controls how much motion blur appears. For perfecting panning photography, start with slower speeds between 1/30 and 1/125 seconds. Adjust based on your subject’s speed: faster subjects need faster shutter speeds to keep them sharp.

Step 2: Use Continuous Autofocus to Track Moving Subjects

Switch your camera to continuous autofocus mode (AF-C or AI Servo). This keeps your subject in focus as you smoothly follow their motion, increasing your chances of sharp results.

Step 3: Position Yourself Correctly for the Best Motion Blur

Stand perpendicular to your subject’s path. This angle lets you pan the camera smoothly from side to side, creating effective motion blur without distorting the subject.

Step 4: Practice Smooth Camera Movement and Follow Through

Use your whole body to swivel the camera smoothly, not just your arms. Begin panning before pressing the shutter and keep moving after taking the shot. This “follow-through” is key to keeping the subject sharp and background blurred.

Step 5: Use Burst Mode to Capture Multiple Frames

Shooting in burst mode lets you take several photos in quick succession. This increases your chances of getting the perfect pan with sharp focus and ideal motion blur.

A diver mid-air in front of a blurred waterfall, emphasizing motion and direction through the panning technique. A red taxi in Hong Kong sharply focused against a streaked background, showcasing the panning technique to convey speed.

Tips for Capturing Motion Blur with Panning Photography

  • Use a tripod with a panning head for added stability.
  • Experiment with different shutter speeds depending on subject speed.
  • Shoot in good lighting to maintain image quality at slower shutter speeds.
  • Practice regularly to develop your timing and smoothness.

Common Mistakes to Avoid When Perfecting Panning Photography

  • Using shutter speeds that are too fast, freezing motion completely.
  • Jerky or uneven camera movement during the pan.
  • Not following through smoothly after pressing the shutter.
  • Losing focus on the moving subject.

Frequently Asked Questions About Panning Photography

What shutter speed is best for panning photography?

A shutter speed between 1/30 and 1/125 seconds generally works well, but it depends on your subject’s speed and lighting conditions.

How do you keep a moving subject sharp while panning?

Use continuous autofocus mode and practice smooth camera movement with proper follow-through after taking the shot.

What subjects are best for panning shots?

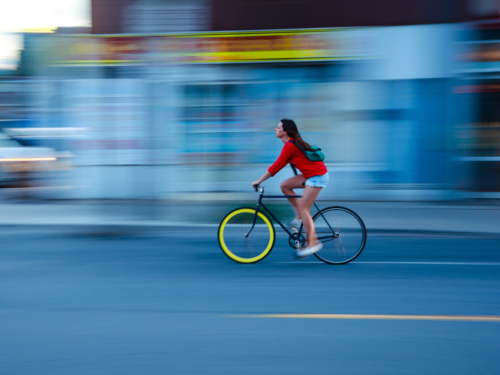
Fast-moving subjects like cyclists, runners, cars, or animals work great for panning to capture motion and energy.

A woman riding a bicycle with a colorful wheel, captured with motion blur to emphasize her speed through an urban setting.

Final Thoughts on Perfecting Panning Photography

Mastering perfecting panning photography takes time and practice, but the ability to capture stunning speed and motion shots is well worth the effort. Use these techniques and tips to add dynamic energy and storytelling to your photos.

Ready to showcase your motion photography skills? Join the 500px community and connect with photographers worldwide!

Extended reading: Master Motion Blur in Street Photography

The post Panning Photography: Capture Speed and Motion Like a Pro appeared first on 500px.

[NDN/ccn/comedia Links]
Thursday, June 26, 2025

Using Color Grading to Evoke Nostalgic Moods

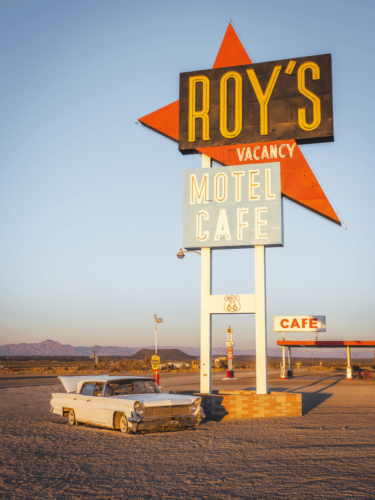
Color grading is a powerful post-processing technique that dramatically influences the emotional impact of your photographs. Specifically, nostalgic moods—often associated with warmth, softness, and subdued tones—can be effectively evoked through intentional color adjustments. Here’s how to master color grading to create evocative images filled with nostalgia and emotional resonance.

A child with red hair sliding down a checkerboard slide, laughing with joy, captured with nostalgic color grading that enhances the warm, golden tones.

Understanding Nostalgia in Photography

Nostalgic images transport viewers back in time, evoking memories, emotions, and sentiments linked to the past. Achieving this effect through photography relies heavily on color, as certain hues and tonal adjustments naturally carry associations with earlier eras.

Choosing Nostalgic Color Palettes

Selecting the right color palette is crucial in creating a nostalgic mood:

  1. Warm Tones: Incorporating warm colors like yellows, oranges, reds, and browns can evoke memories of golden sunsets, old photographs, and vintage scenes.
  2. Muted and Pastel Colors: Soft, muted palettes reduce vibrancy, closely resembling faded or aged photos, effectively enhancing nostalgic feelings.
  3. Film Emulation Presets: Digital tools often offer film emulation presets replicating classic film stocks, providing authentic vintage aesthetics effortlessly.

Techniques for Effective Nostalgic Color Grading

To create an authentic nostalgic effect, consider these techniques:

  • Adjusting White Balance: Slightly warming your photo’s white balance or adding subtle sepia tones can instantly evoke an older, sentimental feel.
  • Lowering Contrast: Reducing overall contrast gently mimics the faded appearance of older images, reinforcing the nostalgic quality.
  • Adding Grain: Introducing subtle grain textures replicates the film photography experience, contributing to the authenticity of your nostalgic mood.

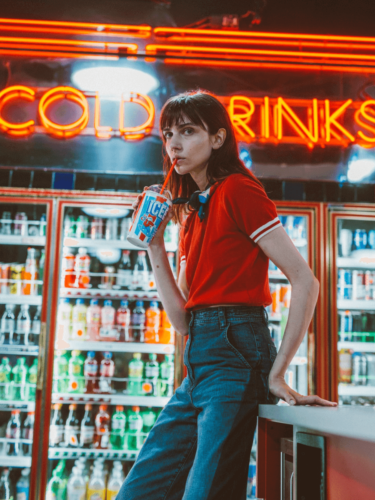
A classic Route 66 roadside scene featuring Roy's Motel CafĂ© sign and a vintage car, photographed with strong vintage aesthetics that evoke mid-century Americana. A young woman in a red shirt sipping an ICEE drink inside a neon-lit convenience store, styled with film emulation to replicate a retro, cinematic look.

Composing for Nostalgia

Color grading complements strong compositional choices:

  • Timeless Subjects: Choose subjects or scenes with timeless qualities—classic architecture, vintage clothing, or objects that evoke personal or historical memories.
  • Soft Lighting: Employ soft, diffused lighting that mimics older film photographs, enhancing the overall nostalgic effect.
  • Focus on Details: Highlighting specific textures, patterns, or objects associated with the past strengthens emotional connections within your compositions.

Refining Nostalgic Color Grading in Post-Processing

Post-processing is crucial for fine-tuning the nostalgic feel:

  • Curves Adjustments: Carefully use curves adjustments to enhance mid-tones and achieve soft, gentle tonal transitions.
  • Color Balance: Slight shifts toward warmer or pastel hues can significantly alter the mood, adding to the nostalgic atmosphere.
  • Selective Saturation: Subtly decrease saturation to replicate the natural fading of aged photographs, reinforcing authenticity.

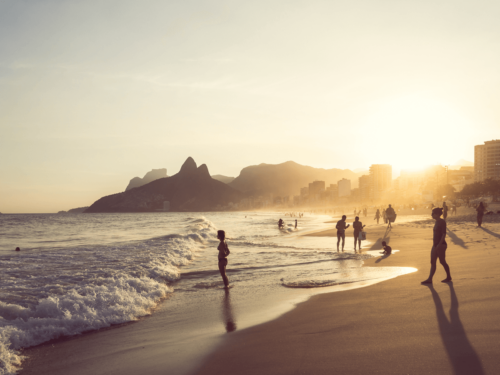
Silhouettes of people walking along a beach at sunset with waves rolling in, captured with nostalgic color grading that softens the scene with warm, dreamy light.

Creative Applications of Nostalgic Color Grading

Nostalgic color grading enhances various photographic genres:

  • Portrait Photography: Creates intimate, emotionally rich images that connect viewers to personal memories and stories.
  • Landscape Photography: Evokes a sense of timelessness and tranquility, transporting viewers to a serene, nostalgic past.
  • Lifestyle and Street Photography: Captures everyday moments with a timeless appeal, resonating emotionally with broader audiences.

By intentionally applying color grading techniques, photographers can effectively craft images filled with nostalgia and emotional depth. Thoughtful adjustments to tone, saturation, and warmth enable you to transport viewers back in time, creating visually compelling narratives that evoke powerful memories and sentiments. Explore the rich possibilities of nostalgic color grading to create timeless, emotive photography.

Extended reading: Color clashes and bold choices in photography

The post Using Color Grading to Evoke Nostalgic Moods appeared first on 500px.

[NDN/ccn/comedia Links]
Wednesday, June 25, 2025

Meet the Winners of May’s Licensing Rush!

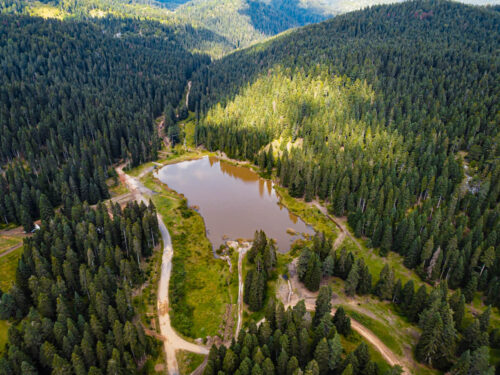
Licensing Rush returned this past May, welcoming over 19,000 submissions from photographers worldwide. The goal? Upload exclusive content, earn bonus points for model-released images, and rise to the top.

We’ve crunched the numbers, and here are the final results.

Taking first place is AllNea — Olha Dobosh — $300 US prize.

Olha is a Spain based photographer, who claimed fiirst place in this Licensing Rush with an impressive 2,739 points! Olha took advantage of the bonus points by submitting a whopping 1,536 accepted photos, 1,203 with model releases! Olha has a great eye for capturing lifestyle moments from a number of different perspectives, allowing her to maximize her Licensing shoots while producing a large volume of relatable photos that resolute with the viewer.

Coming in second place is necmettinsobutay — Necmettin Sobutay — $150 US prize.

Necmettin Sobutay takes second place with a score of 1,247 points. With 960 new and exclusive photos accepted, Necmettin was able to use attached model releases to earn twice as many points with 287 photos. Through landscapes and natural scenery, Necmettin’s work explores themes of exploration, seasonal transitions, and the call of the wild.

Last but not least, in third place is TeeBangkok — Anucha Muphasa — $50 US prize.

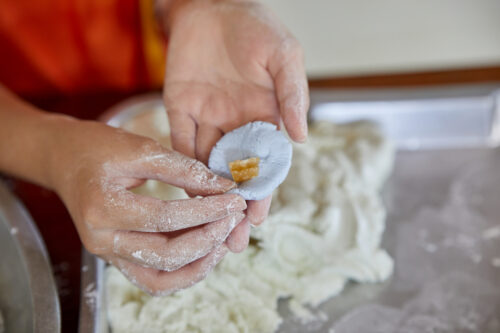
Anucha is a great photographer, based in Thailand, whose portfolio captures a variety of food, lifestyle, and nature photos that highlight the Thai people and culture. Anucha takes third place by earning 1,050 points. With 1,040 photos, ten with model releases.

May’s Licensing Rush brought out the best in the 500px community, with more than 1,500 photographers submitting over 19,000 photos. With each new round, the competition heats up, and the next winner could be you!

Be the first to know about the next 500px Licensing Rush by opting in for 500px Licensing News!

Check out our Licensing Quests for more opportunities to win prizes.

Not on 500px yet? Click here to learn about Licensing with 500px.

The post Meet the Winners of May’s Licensing Rush! appeared first on 500px.

[NDN/ccn/comedia Links]
Thursday, June 19, 2025

Creating Emotion with High-Contrast Black-and-White Photography

Black-and-white photography has an unmatched power to evoke deep emotions, stripping away distractions and focusing purely on form, texture, and contrast. High-contrast black-and-white images, in particular, amplify drama and intensity, creating impactful visuals that captivate and move audiences. Here’s how to master high-contrast monochrome photography to convey powerful emotional narratives.

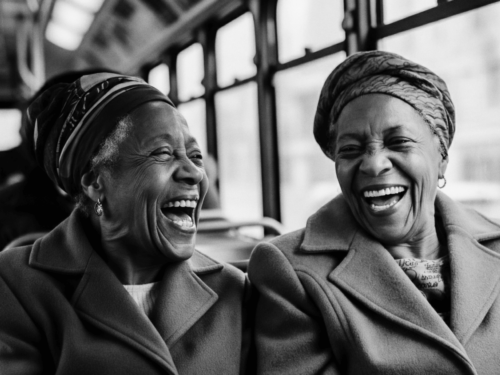
High-contrast black-and-white photography of two women laughing joyfully, capturing an intimate and emotional moment.

The Emotional Power of Black-and-White

Without the element of color, viewers focus more intently on the emotional and narrative aspects of a photograph. High-contrast imagery, featuring bold transitions from deep blacks to bright whites, heightens these effects, often evoking feelings of drama, tension, or introspection.

Essential Techniques for High-Contrast Images

  • Lighting Control: Use directional lighting, such as harsh sunlight or controlled studio lights, to produce pronounced shadows and highlights.
  • Exposure Settings: Expose intentionally, often slightly underexposing your image to deepen shadows and intensify contrast.
  • Subject Selection: Choose subjects with naturally strong shapes, textures, or emotional expressions that benefit from high contrast.

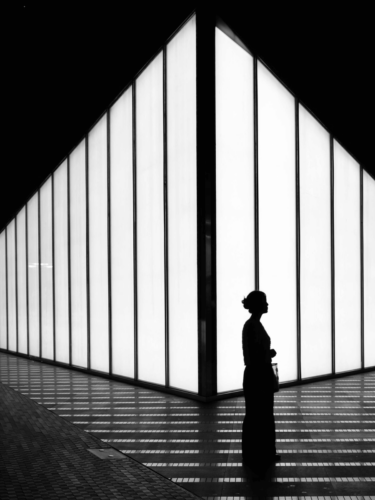
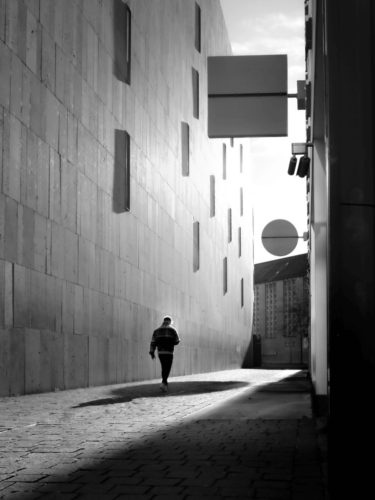
Tonal extremes in black-and-white photography showing a silhouetted woman standing near a large illuminated window, creating strong contrast and dramatic effect.Dramatic contrast in black-and-white photography capturing a lone man walking down a sunlit alleyway, emphasizing shadows and light.

Composing for Impact

Effective composition in high-contrast photography requires deliberate choices. Utilize silhouettes to emphasize strong shapes and lines, simplifying the composition and enhancing emotional impact. Patterns and textures come alive in high contrast, contributing significantly to emotional depth. Keep compositions minimalistic, as clear, uncluttered scenes emphasize the emotional resonance of your images.

Utilizing Contrast to Convey Emotion

The tonal range and interaction in your image can deeply influence emotional perception:

  • Deep Blacks suggest mystery, intensity, or melancholy.
  • Bright Whites symbolize purity, isolation, or hope, depending on context and composition.

Thoughtfully balancing these tonal extremes helps create visually compelling narratives that resonate emotionally with viewers.

Post-Processing for Emotional Depth

High-contrast images benefit greatly from thoughtful post-processing:

  • Enhance contrast in editing software, carefully controlling shadows and highlights to deepen emotional impact.
  • Apply selective dodging and burning to refine specific areas, guiding the viewer’s emotional experience.
  • Slightly enhance textures to reinforce emotional depth and physicality, particularly in portraits or detailed scenes.

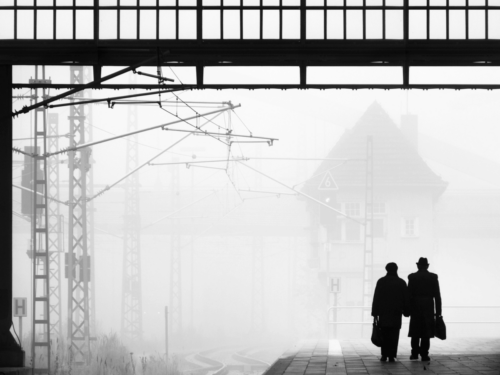
Tonal extremes black-and-white photography of two people walking side-by-side in foggy train station, with silhouettes and diffused light enhancing the scene.

Creative Opportunities with High-Contrast Black-and-White

High-contrast black-and-white photography excels in portraits by conveying powerful emotions and expressions. It also shines in street photography by capturing raw, dynamic scenes filled with narrative potential. Abstract photography benefits from emphasizing shapes and forms, inviting interpretation and emotional response.

High-contrast black-and-white photography is a potent artistic approach, capable of creating deeply resonant images filled with emotion and narrative intensity. By carefully selecting subjects, mastering composition and lighting, and refining your photographs in post-processing, you can leverage this powerful medium to craft captivating visual stories. Embrace the dramatic possibilities of high-contrast photography and explore its profound emotional impact.

Extended reading: Harnessing Silhouette for Dramatic Storytelling

The post Creating Emotion with High-Contrast Black-and-White Photography appeared first on 500px.

[NDN/ccn/comedia Links]

Thursday, June 12, 2025

Harnessing Silhouette for Dramatic Storytelling

Silhouette photography has the unique power to convey powerful emotions and dramatic narratives by emphasizing shape and form over details and textures. By creatively harnessing silhouettes, photographers can captivate viewers’ imaginations, prompting them to fill in unseen details and engage deeply with the story. Here’s how to master silhouettes to elevate your photographic storytelling.

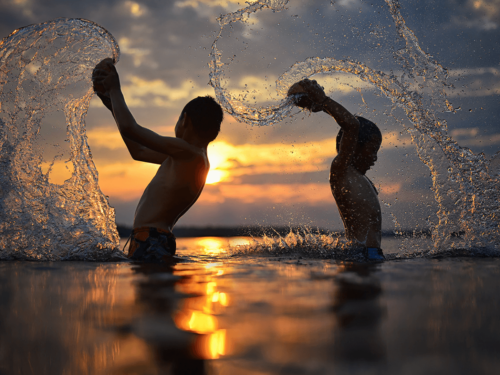
Two children silhouetted against a golden sunset, splashing water in dramatic arcs.

The Art of Silhouettes

A silhouette is created when your subject is backlit, making the subject appear completely dark against a lighter background. Silhouettes rely heavily on strong outlines, instantly recognizable shapes, and clear gestures to tell compelling stories.

Capturing the Perfect Silhouette

Ideal Conditions

  • Sunrise and sunset offer low-angle sunlight, providing ideal lighting conditions to create dramatic silhouettes.
  • Artificial light sources like urban lights, windows, and doorways offer unique creative opportunities for silhouette photography.

Camera Settings

  • Adjust your exposure for the brightest part of the scene, usually the background, to render your subject as a dark silhouette.
  • Choose a narrower aperture (higher f-number) to maintain clear, sharp outlines, ensuring your silhouette remains distinct.

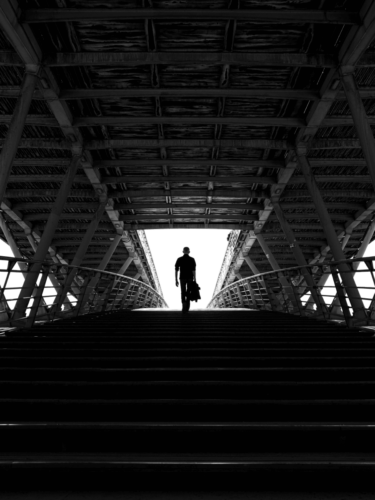
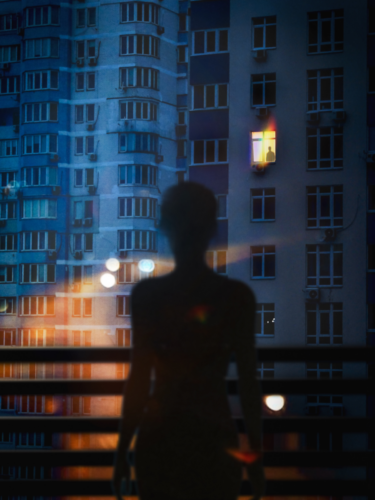
A lone figure ascends a dark staircase under a bridge, evoking a sense of dramatic storytelling.A silhouetted woman gazes out from a balcony, surrounded by the negative space of city high-rises.

Composition Techniques for Dramatic Impact

  • Select subjects with strong, recognizable shapes—human figures, animals, architecture, and trees often create compelling silhouettes.
  • Encourage subjects to use clear gestures or dynamic poses to communicate emotion or action effectively.
  • Utilize negative space to emphasize silhouettes, creating visual balance and directing viewers’ attention to the subject.

Enhancing Storytelling through Silhouettes

Silhouettes simplify your scene, focusing viewers’ attention entirely on the emotional or narrative essence of your image. Obscuring details introduces an element of mystery, inviting viewers to engage actively with your photograph. Silhouettes naturally evoke emotional responses, effectively conveying solitude, contemplation, love, or drama.

Post-Processing Tips

  • Enhance contrast and deepen blacks to emphasize your silhouette, strengthening its dramatic presence.
  • Apply subtle color grading or tone adjustments to amplify mood—warmer tones evoke romance or nostalgia, while cooler tones suggest tranquility or melancholy.

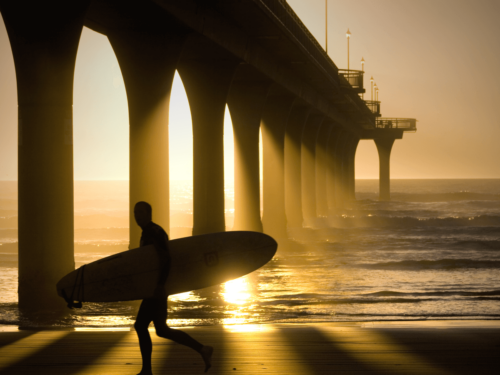
A surfer silhouetted against a golden sunset, walking beneath a pier with long shadows on the beach.

Creative Applications

Silhouettes are versatile across many genres, including intimate portraits, dynamic street photography, and striking nature and wildlife imagery. Using silhouettes thoughtfully allows photographers to communicate powerful forms and actions, creating graphically strong and emotionally resonant photographs.

Silhouettes offer photographers an exceptional tool for impactful storytelling, combining simplicity with emotional intensity. By mastering essential techniques, thoughtful composition, and creative execution, you can craft compelling visual narratives that resonate deeply with your audience. Explore silhouettes in your photography, and uncover the profound storytelling power hidden within shadows.

Extended reading: Creating depth and drama with moody photography

The post Harnessing Silhouette for Dramatic Storytelling appeared first on 500px.

[NDN/ccn/comedia Links]
Thursday, June 5, 2025

Crafting Atmospheric Images with Fog and Mist

Fog and mist offer photographers an exceptional opportunity to create deeply atmospheric, moody, and mysterious imagery. By embracing these unique weather conditions, you can transform ordinary scenes into captivating visual stories filled with depth, emotion, and intrigue. Here’s how to effectively harness fog and mist to elevate your photography.

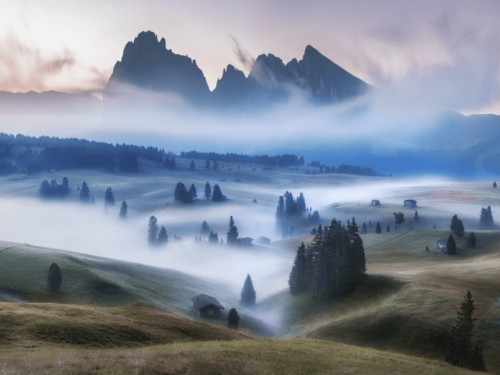
A dreamy mountain landscape with soft fog and mist drifting across rolling hills at dawn, perfect for fog and mist photography.

Understanding the Appeal of Fog and Mist

Fog and mist naturally diffuse light, softening contrasts and textures within a scene. This soft diffusion creates a dreamlike ambiance and adds emotional depth to photographs, often evoking feelings of tranquility, solitude, or mystery. By obscuring and revealing elements selectively, fog and mist invite viewers to engage deeply with the visual narrative, filling in unseen details with imagination.

Ideal Conditions and Timing

The most atmospheric fog and mist usually occur during early mornings or evenings, especially near bodies of water or in valleys and lowlands. Paying close attention to weather forecasts can help you predict ideal conditions. Early preparation and scouting locations ahead of time ensure you’re ready when the perfect atmospheric conditions arise.

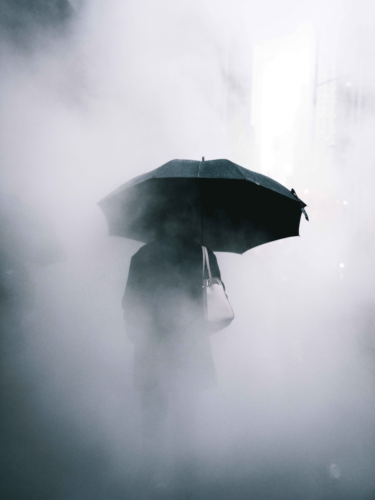
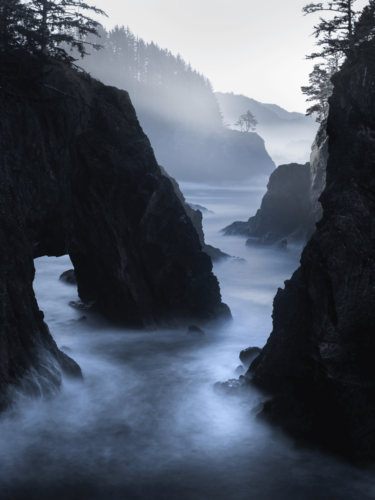
A person holding an umbrella walks through a thick, foggy city street, creating a mysterious and moody foggy scene.Dramatic coastal cliffs and ocean mist under soft twilight, an ideal subject for atmospheric photography.

Composition Techniques for Foggy Scenes

Creating impactful foggy compositions involves thoughtful techniques:

  • Layers and Depth: Use the fog’s varying densities to emphasize depth. Layering foreground, midground, and background elements adds visual complexity and interest.
  • Silhouettes and Shapes: Fog reduces detail, emphasizing strong shapes and silhouettes. Compose your images around distinctive shapes, trees, or structures to anchor your photograph.
  • Simplify the Frame: Minimalism is especially effective in foggy conditions. Embrace simplicity by isolating single elements or subjects against misty backdrops for dramatic effect.

Lighting and Exposure Considerations

Fog significantly impacts exposure and lighting conditions:

  • Soft Light: The diffused, gentle lighting conditions in fog and mist reduce harsh shadows, creating flattering, ethereal images.
  • Exposure Compensation: Fog often tricks camera meters into underexposing scenes. Consider slightly increasing your exposure compensation to accurately capture the brightness and subtle details of foggy conditions.

Creative Opportunities with Fog and Mist

Fog and mist open diverse creative possibilities:

  • Black-and-White Photography: Foggy conditions lend themselves exceptionally well to monochrome photography, highlighting contrasts, textures, and shapes dramatically.
  • Color Tones and Mood: Color images in foggy conditions can carry gentle pastel tones or cool hues, enhancing the atmospheric and emotional impact of your imagery.

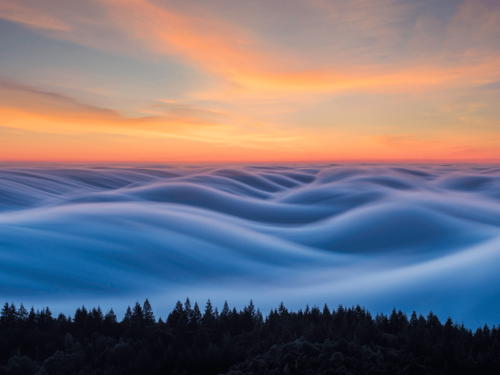
A surreal view of rolling fog waves over a forest at sunrise, showcasing the beauty of atmospheric photography.

Enhancing Foggy Images Through Post-Processing

Post-processing can refine foggy scenes:

  • Contrast and Clarity Adjustments: Fine-tune contrast and clarity subtly to maintain the softness and mood without losing important detail.
  • Selective Sharpening: Apply selective sharpening to key elements or subjects, ensuring they stand out within the foggy environment without diminishing the atmospheric quality.

Fog and mist provide photographers with unique conditions to craft images rich in mood, narrative, and visual intrigue. By thoughtfully considering composition, timing, lighting, and post-processing, you can harness the power of fog and mist to produce atmospheric photography that deeply resonates with viewers. Embrace these ethereal elements, and transform everyday scenes into extraordinary visual stories.

Extended reading: Alpine views: 12 breathtaking mountainscapes to celebrate the chilly season

The post Crafting Atmospheric Images with Fog and Mist appeared first on 500px.

[NDN/ccn/comedia Links]