Friday, November 22, 2024

Textures and patterns in monochrome photography

Black-and-white photography relies heavily on textures and patterns to bring depth and interest to your images, as you don’t have the distraction of color to fall back on. Understanding how to effectively capture textures and patterns in monochrome is essential for creating strong, compelling photographs. Let’s explore how to use these elements to their full potential.

Why textures and patterns matter in monochrome

In the absence of color, texture and pattern take center stage in defining the subject and guiding the viewer’s eye. When captured well, these elements can add dimension, contrast, and a sense of realism to your black-and-white images.

Defining texture in monochrome

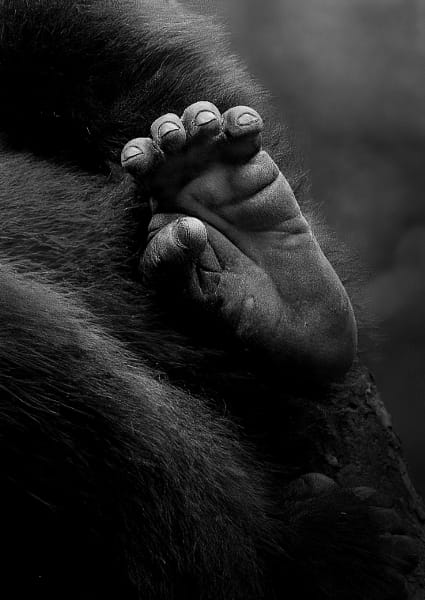
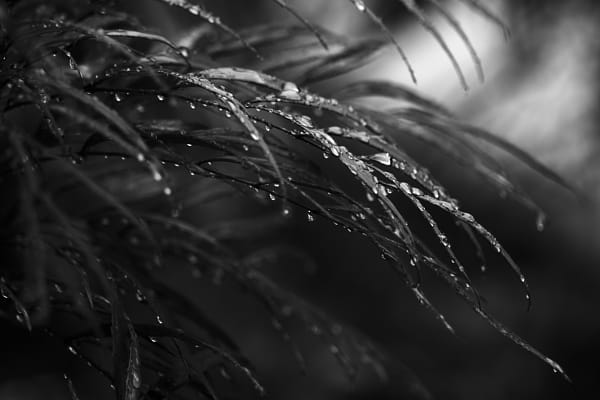
Texture refers to the tactile quality of the subject as it appears in your photograph. Whether it’s the rough bark of a tree, the smooth surface of a stone, or the fine grain of a weathered wall, texture adds a sensory dimension to your image. In black-and-white photography, texture becomes more pronounced because the interplay of light and shadow is more visible, giving your subject a heightened sense of realism.
The role of patterns

Patterns, on the other hand, are repeated visual elements—lines, shapes, or forms—that create rhythm in an image. Whether it’s the repetitive arrangement of tiles on a roof or the natural pattern of waves in the sand, patterns draw the viewer’s attention and add visual structure to your composition. In monochrome, patterns can create a strong sense of balance and cohesion in your image, especially when combined with texture.

Capturing texture in black-and-white

To highlight textures in black-and-white photography, focus on the way light interacts with your subject. Textures are most prominent when light hits the surface at an angle, creating shadows and highlights that emphasize its structure.

Side lighting for texture

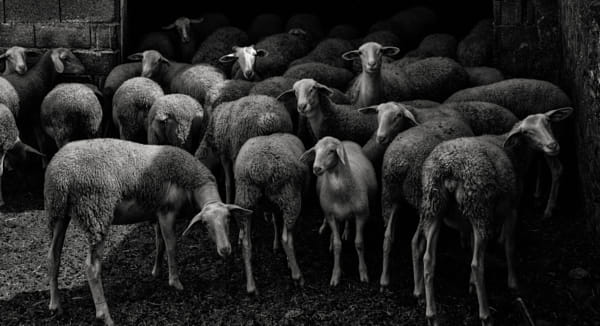
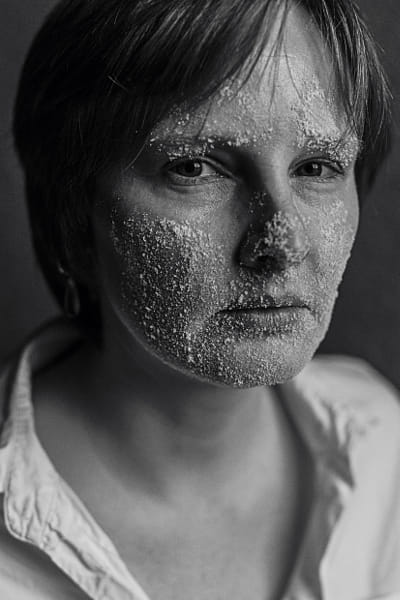
Side lighting is one of the most effective ways to bring out texture. By positioning your light source to the side of your subject, you create strong shadows that accentuate every detail. This technique works particularly well with subjects like rocks, wood, fabric, or skin, where the fine details are crucial to the composition.
Close-up shots for detail

Get in close to your subject to capture the intricate details of its texture. In black-and-white, even the smallest elements—like the weave of a fabric or the ridges of a leaf—can become the focal point of your image. A macro lens can be helpful here, allowing you to focus on minute textures that may go unnoticed in a color photograph.

Using patterns in monochrome photography

Patterns in black-and-white photography can give your images a sense of order and repetition, creating visual interest even in simple compositions. Look for natural or man-made patterns that stand out in the frame.

Finding patterns in nature

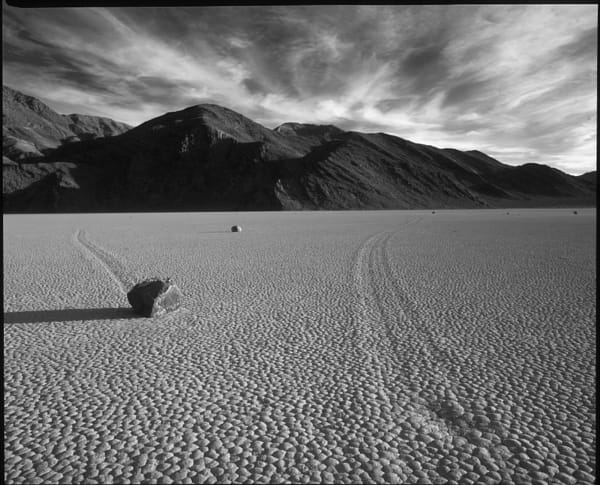
Nature is full of repeating patterns, from the veins of a leaf to the spirals of a seashell. When shooting in black-and-white, these patterns become more striking because the focus shifts away from color and onto the form. Use natural elements like trees, rocks, or clouds to create repeating lines or shapes that add rhythm to your composition.
Exploring architectural patterns

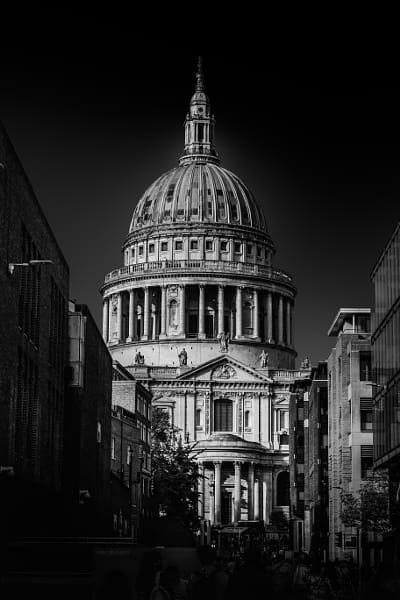
In urban settings, architectural details offer endless opportunities to explore patterns. Look for repetitive lines in buildings, fences, windows, or staircases. When photographed in monochrome, these patterns can create a sense of structure and precision, especially when contrasted with irregular natural elements.
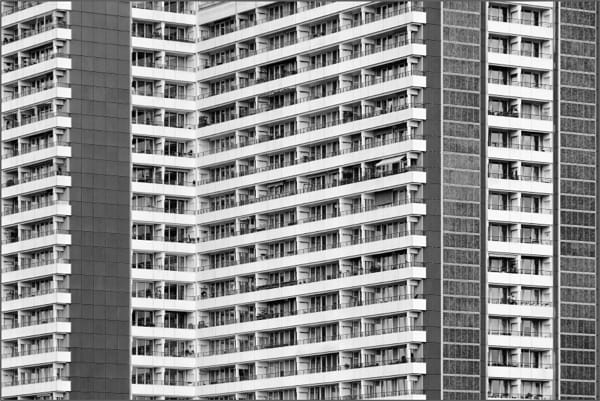
Combining texture and pattern for impact

The real magic in monochrome photography happens when you combine texture and pattern. By doing so, you create layers of interest that draw the viewer’s eye deeper into the frame.

Contrast between smooth and rough

Use contrasting textures to add depth to your composition. For example, juxtaposing the rough bark of a tree against a smooth river stone can create an intriguing visual contrast. The interplay between these elements becomes even more pronounced in black-and-white, where light and shadow do most of the work in defining texture.

Repetition and disruption

While patterns are naturally pleasing to the eye, breaking a pattern can be just as impactful. A single object that disrupts an otherwise consistent pattern can serve as a focal point in your image. For instance, a lone bird perched on a row of identical fence posts can add interest and balance to the composition, especially in black-and-white.

Techniques for enhancing texture and pattern

Once you’ve identified textures and patterns in your scene, you can use a few techniques to enhance them further in your black-and-white photography.

Play with depth of field

A shallow depth of field can isolate textures or patterns, making them stand out from the background. For example, focusing on the textured surface of a stone wall while blurring the background can create a more impactful image, emphasizing the tactile quality of the subject.
Experiment with lighting

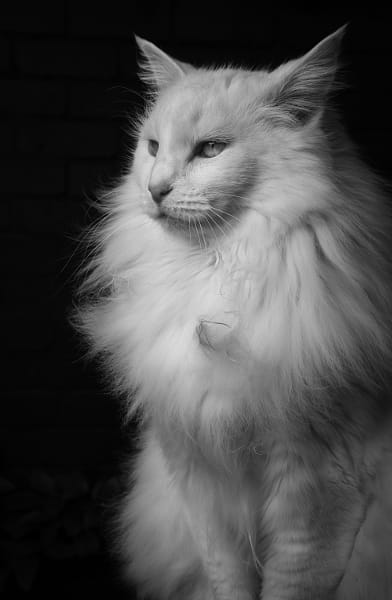
Don’t be afraid to experiment with different lighting conditions to bring out textures and patterns. Harsh, directional light will enhance texture by creating sharp contrasts between light and shadow, while softer, diffused light will smooth out textures and emphasize patterns.
Textures and patterns are vital tools in black-and-white photography, offering depth, contrast, and visual intrigue to your images. By paying attention to how light interacts with surfaces and finding repeating elements in nature or architecture, you can elevate your monochrome photography to new heights. Remember to experiment with lighting, composition, and focus to bring out the best in your subjects.

Not on 500px yet? Click here to learn about Licensing with 500px.

The post Textures and patterns in monochrome photography appeared first on 500px.

[NDN/ccn/comedia Links]
Thursday, November 21, 2024

Capturing emotion with black and white portraits

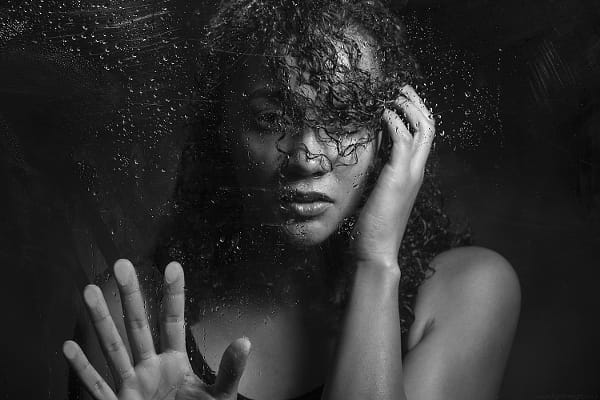
Black-and-white portraits have a timeless quality that brings out the raw emotion and character of the subject. Without the distraction of color, the focus shifts entirely to expression, texture, light, and shadow. Whether you’re shooting in natural light or in a studio, capturing powerful black-and-white portraits requires a thoughtful approach to composition, lighting, and connection with your subject. Here’s how to create striking monochrome portraits that stand out.

Understanding the power of black-and-white portraits

Black-and-white portraits are compelling because they simplify the image, allowing the viewer to focus more on the emotional aspects of the photograph. The absence of color emphasizes textures, facial expressions, and subtle nuances in light that might be overlooked in color portraits.

Highlighting emotion

Without the distraction of color, black-and-white photography draws attention to the subject’s eyes, body language, and facial expressions. A well-timed smile or a pensive gaze becomes the focal point, conveying a sense of emotion that is often more powerful in monochrome.

Enhancing texture and detail

Black-and-white photography excels at showcasing details like skin texture, hair, and wrinkles. These elements can add depth to your portraits, making them feel more authentic and raw. By controlling light, you can enhance or soften these textures to suit the mood of the image.

Using light to sculpt your subject

Lighting is one of the most crucial elements in black-and-white portrait photography. The way light falls on your subject can dramatically change the mood and impact of the image.

Side lighting for depth

Side lighting, also known as “Rembrandt lighting” in portraiture, can create depth and dimension in your portraits. Position your light source to the side of the subject, casting shadows on one side of the face while illuminating the other. This contrast between light and shadow adds drama and highlights the contours of the face.

Soft light for subtlety

If you’re aiming for a softer, more flattering look, use diffused light to wrap gently around your subject. This can be achieved by shooting on an overcast day or using a diffuser in a studio setup. Soft light minimizes harsh shadows and creates a more even tone, perfect for capturing the gentle details of a subject’s face.

High contrast lighting for drama

For a more intense, moody portrait, high contrast lighting can create a dramatic effect. Using strong directional light, such as a spotlight, can highlight certain features of your subject while casting deep shadows on others. This works especially well in black-and-white, where the interplay between light and dark becomes the focal point.

Composition tips for black-and-white portraits

Without color to guide the viewer’s eye, composition becomes even more critical in black-and-white portraiture. The placement of the subject, the use of space, and the framing of the shot all contribute to the overall impact of the image.

Framing and cropping

Close-up portraits tend to work exceptionally well in black and white because they focus attention on the subject’s face and expression. Tight cropping around the face can intensify the emotional connection between the subject and the viewer. Experiment with cropping just below the chin or closer to the eyes to direct the viewer’s gaze where you want it.

Negative space for balance

Using negative space in your composition can enhance the simplicity and impact of your black-and-white portraits. Leaving empty space around the subject can make the portrait feel more contemplative or peaceful, allowing the viewer to focus entirely on the emotion conveyed in the face or posture.

Eye contact and gaze

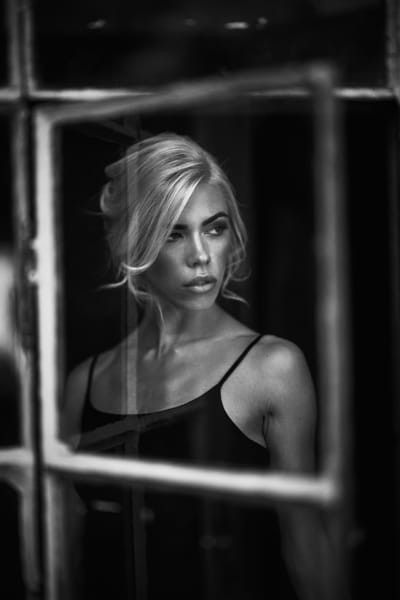
In portraits, where the subject is looking can dramatically influence the viewer’s engagement. Direct eye contact with the camera creates an immediate connection, drawing the viewer in. Alternatively, having the subject gaze off-camera can add an element of mystery or introspection, encouraging the viewer to wonder what the subject is thinking or looking at.

Capturing raw emotion in portraits

The key to a successful black-and-white portrait is capturing authentic emotion. This requires building a rapport with your subject and making them feel comfortable in front of the camera.

Building connection

Spend time talking to your subject before and during the shoot. Encourage natural conversation to help them relax and express their true emotions. Candid moments often lead to the most powerful portraits, so be ready to capture them when they happen.

Directing with purpose

Give your subject clear, simple directions that evoke emotion. Rather than telling them to “smile,” ask them to think about something that makes them happy. Similarly, if you’re aiming for a more serious portrait, ask them to reflect on a meaningful moment in their life. These subtle prompts can elicit genuine expressions that resonate in your final image.

Incorporating texture and contrast

Black-and-white portraits thrive on texture and contrast. From the texture of the skin to the fabric of the clothing, each element plays a role in shaping the overall feel of the image.

Highlighting skin texture

In monochrome portraits, skin texture can add character and realism. Don’t shy away from wrinkles, freckles, or imperfections—instead, use them to tell a story. The interplay of light and shadow across the skin can add dimension and make your subject’s face come to life.

Contrast between light and dark

Strong contrast between light and dark areas can create a sense of drama and intensity. Whether it’s the contrast between your subject’s hair and the background, or the sharp distinction between their features and the shadows on their face, embrace contrast to enhance the depth and impact of your portraits.

Black-and-white portraiture is an art form that strips away distractions and focuses on the essence of the subject. By mastering the interplay of light and shadow, using thoughtful composition, and building a strong connection with your subject, you can create powerful, emotional portraits that resonate with viewers.

Not on 500px yet? Sign up here to explore more impactful photography.

The post Capturing emotion with black and white portraits appeared first on 500px.

[NDN/ccn/comedia Links]
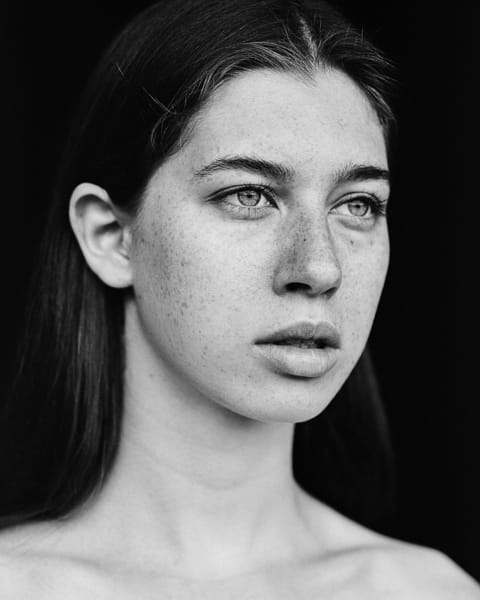
Understanding light and shadow in black-and-white photography

Black-and-white photography removes the distraction of color, allowing light and shadow to take center stage in shaping the mood and depth of an image. Whether you’re shooting landscapes, portraits, or abstract compositions, mastering the interplay between light and shadow can elevate your black-and-white photography. Here’s how to harness these elements effectively.

The role of light in black-and-white photography

In black-and-white photography, light defines the subject, highlights texture, and emphasizes form. Without color, your composition relies on how the light interacts with the elements in your scene, creating a strong sense of contrast and depth.

Hard vs. soft light

Hard light, such as direct sunlight or a single artificial light source, produces sharp, well-defined shadows. It’s perfect for adding drama to a scene, especially when shooting architecture, landscapes, or still life. In contrast, soft light, found during overcast days or diffused through curtains, creates gentle transitions between light and shadow. This type of lighting is often used in portrait photography, where it flatters skin tones and softens features.

Using shadows to create depth and mood

Shadows in black-and-white photography aren’t just the absence of light—they play a crucial role in defining the structure of your image and conveying mood. Deep shadows can add mystery and tension, while subtle shadows bring softness and nuance to the composition.

Creating depth with shadows

To create depth in your images, use the interplay between light and shadow to separate the foreground from the background. Shadows can help guide the viewer’s eye through the image, leading them from the darker areas into the lighter, more focused parts of the composition.

Mood through shadow placement

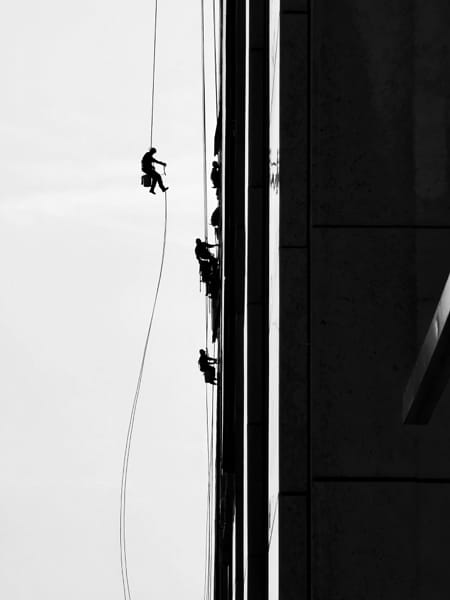
Where you place the shadows in your frame can dramatically influence the mood of your photo. For example, shadows cast from the side emphasize texture and form, while backlit subjects create striking silhouettes, reducing your subject to an outline and focusing the attention on their shape and posture.

Natural vs. artificial lighting for black-and-white photography

Lighting conditions, whether natural or artificial, will greatly affect the outcome of your black-and-white photos. Understanding how to manipulate both types of light will give you more control over your final image.

Natural light

Natural light offers a wide range of possibilities, depending on the time of day and weather conditions. The golden hour—early in the morning or late in the afternoon—provides low, soft light that can create long, dramatic shadows, perfect for landscapes and outdoor portraits. On the other hand, midday sun produces harsher, more direct light, which can be great for architectural shots or street photography where you want high contrast between light and shadow.

Artificial light

In a controlled environment like a studio, artificial lighting allows you to shape your light and shadow precisely. By adjusting the distance, angle, and intensity of your light source, you can create a wide range of effects. Softboxes and reflectors can diffuse light, while spotlights can add sharp, intense highlights and deep shadows.

Composing with light and shadow

Good composition in black-and-white photography often revolves around the balance of light and shadow in the frame. Pay attention to how these elements work together to highlight your subject and draw the viewer’s eye.

The power of contrast

High-contrast images—those with strong differences between light and dark—are a hallmark of black-and-white photography. When composing your shot, look for scenes that naturally offer a range of tonal values, from pure whites to deep blacks. This will help create a visually dynamic image that grabs the viewer’s attention.

Low-contrast compositions

While high contrast is often a go-to technique, don’t overlook the power of low-contrast scenes. In these images, the difference between the light and dark areas is more subtle, creating a soft, ethereal effect. Low-contrast compositions work well for subjects like foggy landscapes or portraits in diffused light, where the mood is more contemplative and quiet.

Capturing motion with light and shadow

Black-and-white photography lends itself well to capturing motion through light and shadow. Whether it’s the blur of moving water or the gentle sway of grass in the wind, motion can be enhanced by the way light interacts with your subject.

Long exposures for movement

To capture motion, use longer shutter speeds to blur moving elements while keeping stationary objects sharp. In black-and-white, this can create a beautiful contrast between solid and fluid forms, making the motion feel more dynamic.

Freezing motion

For a more dramatic effect, freeze motion using a fast shutter speed. The sharp contrast between frozen movement and deep shadows can result in a powerful, high-impact image.

Mastering light and shadow is the key to creating compelling black-and-white photographs. By understanding how different types of light shape your subject and how shadows contribute to the mood and depth of your image, you can craft photos that go beyond the basics and make a lasting impression. Experiment with both natural and artificial light, play with contrast, and don’t be afraid to let the shadows do some of the storytelling for you.

Not on 500px yet? Sign up here to explore more impactful photography.

The post Understanding light and shadow in black-and-white photography appeared first on 500px.

[NDN/ccn/comedia Links]
Friday, November 1, 2024

And the winners of September’s Licensing Rush are…

This past September, photographers from around the world raced to showcase their creativity in our most recent Licensing Rush competition—and the results are finally in! For a whole month, participants pushed their limits to get as many exclusive photos accepted to 500px Licensing, earning bonus points for every photo with an attached model release.

Now, it’s time to reveal the top three photographers who captured the spotlight and will be taking home cash prizes!

In first place is AllNea—Olha Dobosh—$300 US prize.

Olha, an exceptional 500px Licensing contributor, claims first place in this Licensing Rush with an impressive 1,997 points! Out of 1,103 accepted photos, 894 included model releases, doubling their point value. Olha’s portfolio focuses on authentic lifestyle moments centered around travel, creativity, adventure, connection, and family. Her talent lies in capturing different models in real, relatable moments, making each shoot feel dynamic and genuine.

Coming in second place is PetervanHaastrecht—Peter van Haastrecht—$150 US prize.

Taking the silver medal with a score of 597 points is Peter van Haastrecht. With 577 new photos accepted, Peter earned bonus points for model releases attached to 20 photos. Peter’s Licensing series showcases stunning landscapes during golden hour and interesting architecture. Peter’s photos highlight not only the beauty of nature but also that of man-made structures, rich with history and purpose.

The third place prize goes to a new contributor almeidawilson—Wilson Almeida—$50 US prize.

New to 500px, Wilson Almeida has quickly made a name for himself, earning third place in the Licensing Rush with 466 points. Despite not using models and missing out on bonus points, Wilson secured the bronze with 466 stunning new photos. His portfolio showcases a mix of vibrant landscapes and beautifully plated food, two timeless and always-demand categories in commercial photography.

With over a thousand photographers participating and more than nine thousand photos submitted, September’s Licensing Rush was highly competitive. The additional bonus for model-released content made the challenge even greater, but 500px photographers rose to the challenge with remarkable creativity and skill.

Opt in for 500px Licensing News to stay in the know and watch out for the next Licensing Rush announcement, for your chance to win!

Check out our Licensing Quests for more opportunities to win prizes.

Not on 500px yet? Click here to learn about Licensing with 500px.

The post And the winners of September’s Licensing Rush are… appeared first on 500px.

[NDN/ccn/comedia Links]

Tuesday, October 29, 2024

Making the most of seasonal color contrast in photography

As the colors of autumn emerge in full force, using contrast in your photography becomes a powerful tool for creating images with depth and impact. The interplay between warm and cool tones, combined with the shifting light, allows for unique opportunities to highlight your subjects in creative ways. Here’s how to make the most of seasonal color contrast in your fall photography.

Understanding color contrast

Color contrast refers to the juxtaposition of different colors that stand out against one another. In autumn, the natural contrast between warm colors (reds, oranges, and yellows) and cool colors (blues and greens) creates a dynamic scene that draws the viewer’s attention.

Warm vs. cool tones

Warm tones, like the fiery reds and oranges of autumn leaves, evoke feelings of warmth and comfort. In contrast, cool tones, like a crisp blue sky or green foliage, bring balance and calm to your images. When these two are combined thoughtfully, the resulting contrast can create a striking composition.

Complementary colors

Incorporate complementary colors to enhance the contrast in your photos. For example, capture the bold contrast between red autumn leaves against a clear blue sky or golden foliage reflected in a cool, blue body of water. These color combinations are visually stimulating and naturally guide the viewer’s eye to your subject.

Composing with color contrast

Once you’ve identified the colors in your scene, it’s time to compose your shot to maximize the impact of the contrast.

Use natural divisions

Look for natural divisions in the landscape where warm and cool tones meet. This could be the line where golden trees meet a green field, or where warm sunlight cuts through a cool shadow. These natural divisions help balance your composition and add visual interest.

Layering colors

Add depth to your photos by layering warm and cool colors in the foreground, middle ground, and background. For instance, a photo with a yellow tree in the foreground, a blue river in the midground, and a forest of red and orange trees in the background creates a layered image full of contrast and depth.

Contrast in lighting

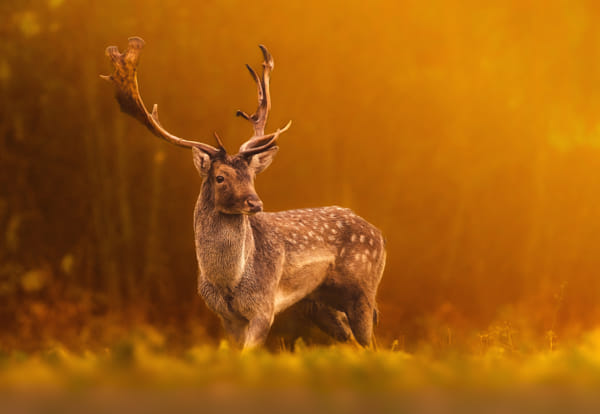
Fall light often comes in softer and lower, providing long shadows and gentle highlights. Make use of this lighting to add contrast to your photos. Warm, golden-hour light enhances the reds and oranges of fall foliage, while the cooler shadows create a dynamic contrast within the same image.

Techniques for enhancing color contrast

Understanding how to work with color contrast is just the beginning. Here are a few techniques to help you maximize the impact of seasonal colors.

Polarizing filters

A polarizing filter can enhance color contrast by deepening blue skies and reducing reflections. This is particularly useful when shooting landscapes with both warm autumn leaves and cool skies or water. It also helps eliminate the glare on wet surfaces, making colors appear more vibrant.

Adjusting white balance

Tweak your camera’s white balance to either warm up or cool down your shots. For example, you can make an autumn scene feel cozier by slightly warming the white balance, emphasizing the natural glow of the fall colors. Alternatively, you can cool down the background to make the warm tones pop even more.

Shooting in overcast conditions

While sunny days might seem ideal, overcast conditions are perfect for bringing out the richness of fall colors. The diffused light softens harsh shadows, allowing the vibrant hues of the season to stand out without the distraction of stark lighting. The contrast between soft, gray skies and bright autumn foliage is naturally compelling.

Techniques for capturing seasonal color contrast

To truly elevate your autumn photography, it’s essential to understand how to make color contrast work in various settings.

Include a pop of color

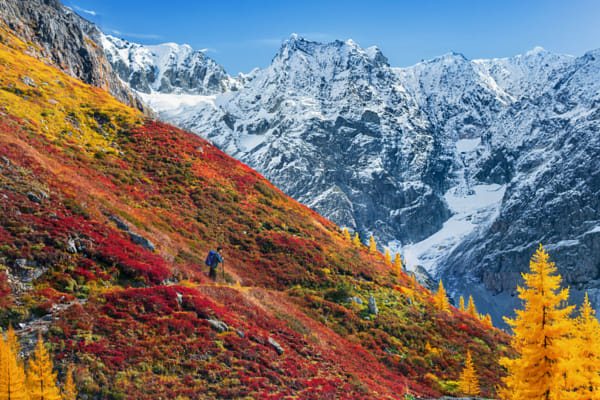
If you’re working in a scene dominated by one color, such as a forest filled with red and orange leaves, find a way to introduce a contrasting element. This could be a person wearing a blue jacket or a river running through the scene. The single contrasting color will grab attention and create focus in an otherwise monochromatic image.

Focus on simplicity

While color contrast is visually stimulating, too much can overwhelm the viewer. Keep your compositions simple by focusing on a few key contrasting colors. Use the natural fall palette of reds, oranges, and yellows against cooler blues and greens to create balanced yet impactful images.

Autumn’s vibrant and varied colors make it one of the most exciting seasons for photographers. By harnessing the power of color contrast, you can create images that are not only visually striking but emotionally resonant. Experiment with warm and cool tones, play with light and shadow, and let the natural contrast of the season elevate your photography to the next level.

Not on 500px yet? Click here to learn about Licensing with 500px.

The post Making the most of seasonal color contrast in photography appeared first on 500px.

[NDN/ccn/comedia Links]

Monday, October 28, 2024

Creating stunning autumn portraits

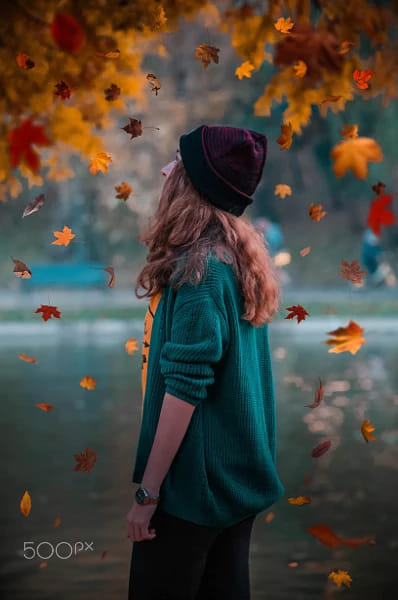
Autumn provides an incredible backdrop for portrait photography, with its natural warmth and vibrancy. However, capturing the essence of a subject in a seasonal setting requires more than just pointing the camera. Here are some expert tips to elevate your autumn portrait shots, ensuring your images resonate with the season’s mood while highlighting the subject.

Choosing the right location

The right location can significantly impact the tone of your portraits. Whether in a park, forest, or urban setting, look for spots that naturally highlight the warm autumn colors.

Forests and wooded areas

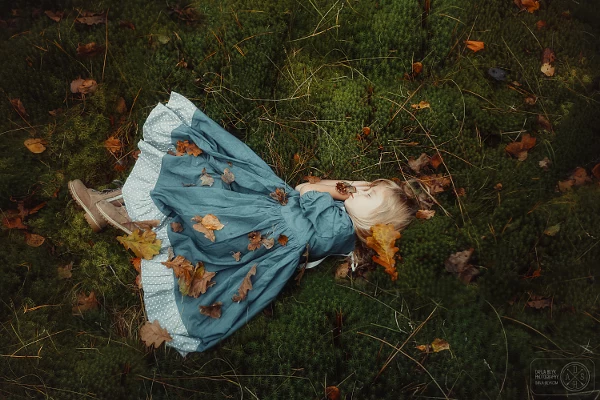
A forest or wooded area filled with trees in fall colors offers a soft and diffused background. The leaves create a beautiful texture that enhances the subject without overpowering them. Look for areas where the leaves are scattered on the ground to add additional depth and visual interest to your portraits.

Urban settings

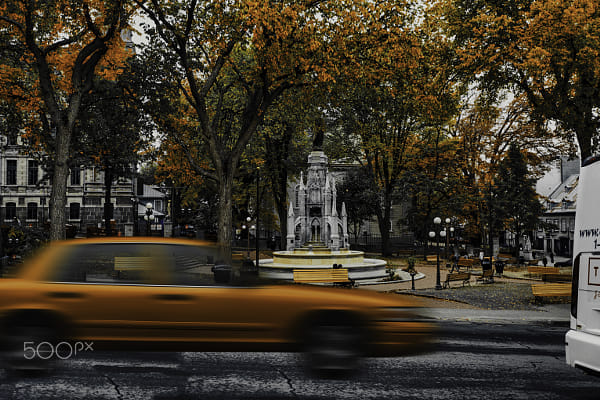
Even in urban areas, autumn leaves can create fantastic contrasts. Think of tree-lined streets, parks, or even buildings covered in ivy turning red and orange. These urban settings can provide both structure and nature in one frame.

Working with natural light

Lighting is critical in portrait photography, and autumn brings unique opportunities to experiment with natural light.

Golden hour magic

The soft, golden light just after sunrise or before sunset is ideal for autumn portraits. This time of day casts a flattering, warm glow on the subject, complementing the colors of the season. Position your subject so that the sunlight gently highlights their face while avoiding harsh shadows.

Overcast days

Don’t shy away from overcast days. The clouds act as a natural diffuser, softening the light and reducing harsh contrasts. This results in a more even light across the subject’s face, making it perfect for moody or intimate autumn portraits.

Composition and framing

Portrait composition is just as important as any landscape or environmental shot. Use the surrounding environment to frame your subject effectively.

Rule of thirds

Position your subject slightly off-center to create a more dynamic and engaging composition. You can use the autumn foliage or trees to naturally balance the frame, guiding the viewer’s eye toward the subject.

Frame within a frame

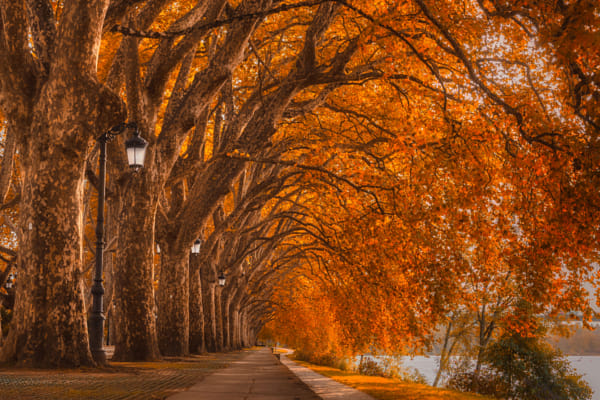
Use natural elements, such as arching tree branches or even doorways, to create a frame within the image. This technique focuses the viewer’s attention on the subject while adding structure to your portrait.

Bringing out emotion

Great portrait photography isn’t just about technique—it’s about capturing the emotion and personality of your subject. In autumn, the warmth and serenity of the season can enhance the mood.

Candid moments

Encourage your subject to interact with their surroundings, whether it’s throwing leaves, walking through a forest, or simply enjoying the cool breeze. These candid moments bring authenticity to your portraits, allowing the viewer to connect more deeply with the image.

Connection with the camera

For more posed portraits, work on building a rapport with your subject so they feel comfortable in front of the camera. A relaxed subject will express more genuine emotion, which is essential for creating compelling autumn portraits.

Colors and wardrobe

The color palette of autumn offers a natural harmony that complements most subjects, but careful consideration of wardrobe choices can make a huge difference in the overall feel of the portrait.

Coordinating with the background

Encourage your subject to wear neutral or earthy tones that blend well with the autumn surroundings—think warm browns, deep reds, mustard yellows, or olive greens. These colors create a harmonious and cohesive look that enhances the mood of the portrait.

Contrasting colors

Alternatively, you can have your subject wear colors that contrast with the background. A deep blue jacket against a sea of orange leaves can create an eye-catching contrast that makes the subject pop without overwhelming the image.

Practical tips for autumn portraits

Layering textures

Play with the textures of fall—layered clothing, scarves, and hats all add depth and character to your portraits.

Use props

A well-placed prop, like a blanket or coffee cup, can make the subject feel more natural and relaxed, adding context to your autumn scene.

Autumn portraits offer the perfect opportunity to combine the rich colors of the season with the unique personality of your subject. By thoughtfully considering your location, lighting, composition, and wardrobe choices, you can create timeless portraits that evoke the warmth and beauty of autumn.

Not on 500px yet? Sign up here to explore more impactful photography.

The post Creating stunning autumn portraits appeared first on 500px.

[NDN/ccn/comedia Links]

Thursday, October 17, 2024

Your guide to shooting seasonal landscapes

Autumn landscapes offer a rich tapestry of colors and textures that transform familiar scenes into breathtaking vistas. Capturing these seasonal landscapes is about more than just finding the right location; it’s about using the changing light and unique features of fall to tell a story through your photographs. Here’s how to make the most of seasonal landscapes this fall.

Understanding the atmosphere

Fall landscapes are dynamic, changing dramatically depending on weather, light, and time of day. The interplay of light and atmosphere in autumn creates opportunities to capture mood and depth in ways that aren’t possible at other times of the year.

Embrace misty mornings

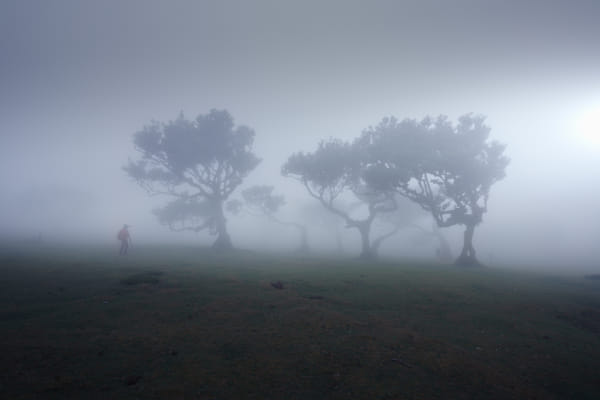
Early autumn mornings often bring mist and fog, which can add a mysterious, ethereal quality to your images. Mist can soften the background and isolate your subject, making it stand out. When shooting in fog, aim for simplicity by focusing on one or two key elements in the scene, as the fog will naturally reduce distractions and guide the viewer’s eye.

Time of day matters

The time of day can dramatically affect the mood of your landscape images. While the golden hour is always a favorite, autumn provides opportunities to shoot during different times of the day. Overcast skies can give you soft, diffused light that brings out the natural colors of the landscape without harsh shadows. Don’t overlook mid-afternoon or cloudy days—both can yield beautifully balanced and moody shots.

Composition techniques for seasonal landscapes

When composing your autumn landscape shots, think about how to use the natural elements around you to create depth, texture, and interest.

Use layers to add depth

Autumn landscapes often have natural layers, from the colorful tree canopy down to the fallen leaves on the forest floor. Position yourself to capture these layers, using foreground elements to lead the viewer’s eye deeper into the frame. For example, fallen leaves in the foreground can act as a natural border, drawing attention to the trees in the background.

Incorporate water

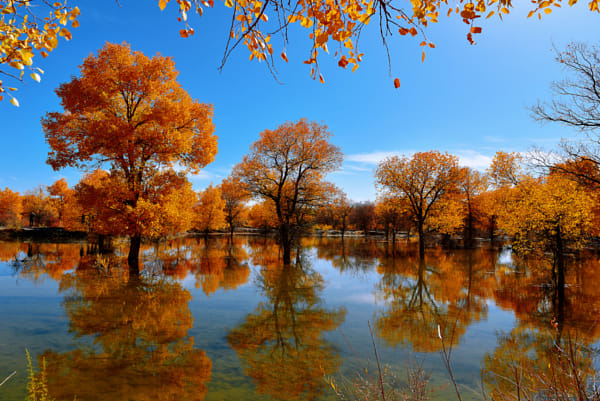
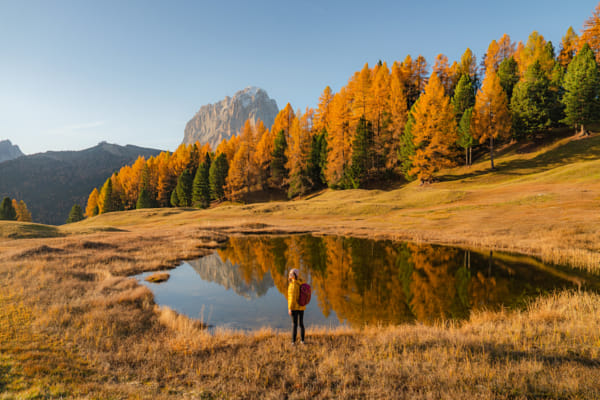
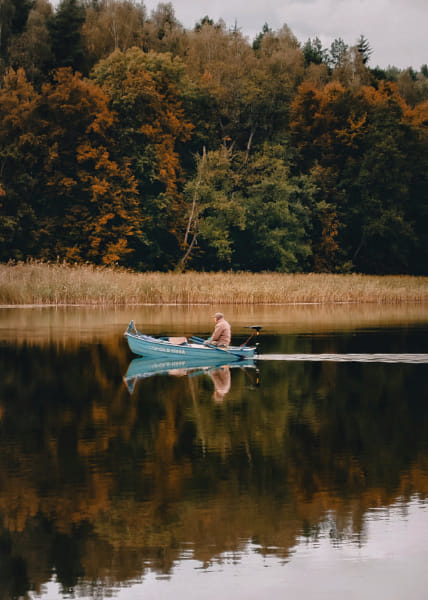
Lakes, rivers, and streams can mirror the vibrant colors of autumn, creating symmetry and interest in your landscape photos. Reflections can also provide a sense of balance and calm, particularly when shooting early in the morning or late in the day when the water is still.

Framing with natural elements

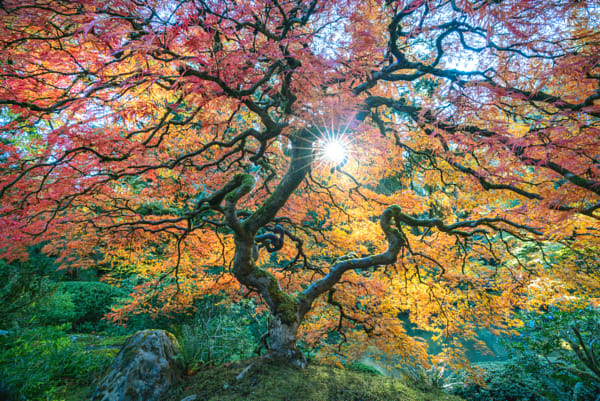
Using natural frames like tree branches, archways, or rock formations can help guide the viewer’s eye toward the focal point of your image. This technique adds structure and enhances the overall composition, making your landscape photos feel more intentional.

Light and shadow play

Autumn is a season of low, soft sunlight that casts long shadows and highlights textures in the landscape. This interplay between light and shadow can create dramatic and visually interesting scenes.

Capture the golden light

The golden hour in autumn is particularly special. The warm tones of the leaves complement the soft, golden light of the setting sun, creating a harmonious color palette. During this time, the sunlight is more directional, which helps emphasize the texture and form of the landscape, making your shots feel more three-dimensional.

Pay attention to shadows

Long shadows in the fall can help create depth and dimension in your landscapes. Look for ways to incorporate shadows into your composition, either as leading lines or as a contrast to the brightly lit areas of the image. This technique is especially effective when shooting in forests or areas with uneven terrain.

Capturing motion in autumn landscapes

Don’t just capture still scenes—bring a sense of movement into your photos by focusing on elements like falling leaves, rushing water, or swaying grasses. Using a slower shutter speed can help blur these moving elements, creating a dynamic contrast with the solid, stationary parts of your composition.

Autumn is a season that offers photographers endless creative possibilities. By understanding how to use light, atmosphere, and compositional techniques, you can capture the essence of this fleeting season in ways that are both visually stunning and emotionally evocative.

Remember to explore different perspectives, play with the dynamic colors of the season, and embrace the unique opportunities that autumn brings. Whether you’re capturing misty mornings, golden afternoons, or vibrant reflections, the key is to be patient, experiment, and let the beauty of the season guide your creativity.

Not on 500px yet? Click here to learn about Licensing with 500px.

The post Your guide to shooting seasonal landscapes appeared first on 500px.

[NDN/ccn/comedia Links]